I. Introduction to Figma MCP
Figma-MCP is a server that implements the Model Context Protocol, providing standardized context information for AI to directly access and understand Figma design resources. This integration opens up new possibilities for designers and developers:
- Automating design-to-code conversion workflows with AI and Figma-MCP
- Intelligently generating UI components based on designs
- Significantly improving team collaboration efficiency
- Reducing communication costs between design and development
II. Technical Principles of Figma-MCP
MCP Protocol Core Architecture
The MCP Protocol is essentially a standardized interface that allows LLMs to understand and operate on data and functionality from external applications (like Figma). This protocol provides a structured data exchange framework, enabling AI tools to “see” and “understand” design elements.
The power of MCP lies in its universality and extensibility. Through a unified interface, different AI tools can access Figma resources in the same way, without needing to develop separate integration solutions for each tool.
Deep Integration with Figma API
The Figma-MCP server connects to Figma’s official API, providing these key functions:
- Resource Access: Allows AI tools to read Figma files, layers, components, and styles
- Structure Recognition: Enables AI to understand the hierarchical structure and organization of designs
- Property Extraction: Automatically retrieves design specifications like colors, fonts, and spacing
This integration supports read operations, allowing AI tools to extract design information and generate deep insights without modifying the original design files, ensuring the security of design assets.
AI-Driven Design Automation Workflows
Through Figma-MCP, designers and developers can implement various automation workflows:
- Code Generation: Automatically generate component code for frameworks like React and Vue based on designs
- Style Extraction: Automatically create CSS/SCSS variables or Tailwind configurations
- Component Library Building: Convert design systems into reusable code component libraries
- Design Optimization Suggestions: AI analyzes designs and provides improvement recommendations
III. Setting Up Figma-MCP Environment
System and Account Preparation
Before starting with Figma-MCP, ensure you have the following prerequisites:
- Node.js (v16.0 or higher)
- npm (v7.0 or higher) or pnpm (v8.0 or higher)
- Figma account: Professional or Enterprise version recommended
- Figma API access token: With read permissions
| Requirement | Minimum Version | Recommended Version |
|---|---|---|
| Node.js | v16.0 | v18.0+ |
| npm/pnpm | v7.0/v8.0 | Latest version |
| Figma account | Free version | Professional version |
Obtaining a Figma API Access Token
The Figma API token is key to connecting the MCP server with your Figma account. Here are the detailed steps to obtain it:
- Log in to Figma
- Access Personal Settings: Click on your profile avatar in the sidebar, then select “Settings”
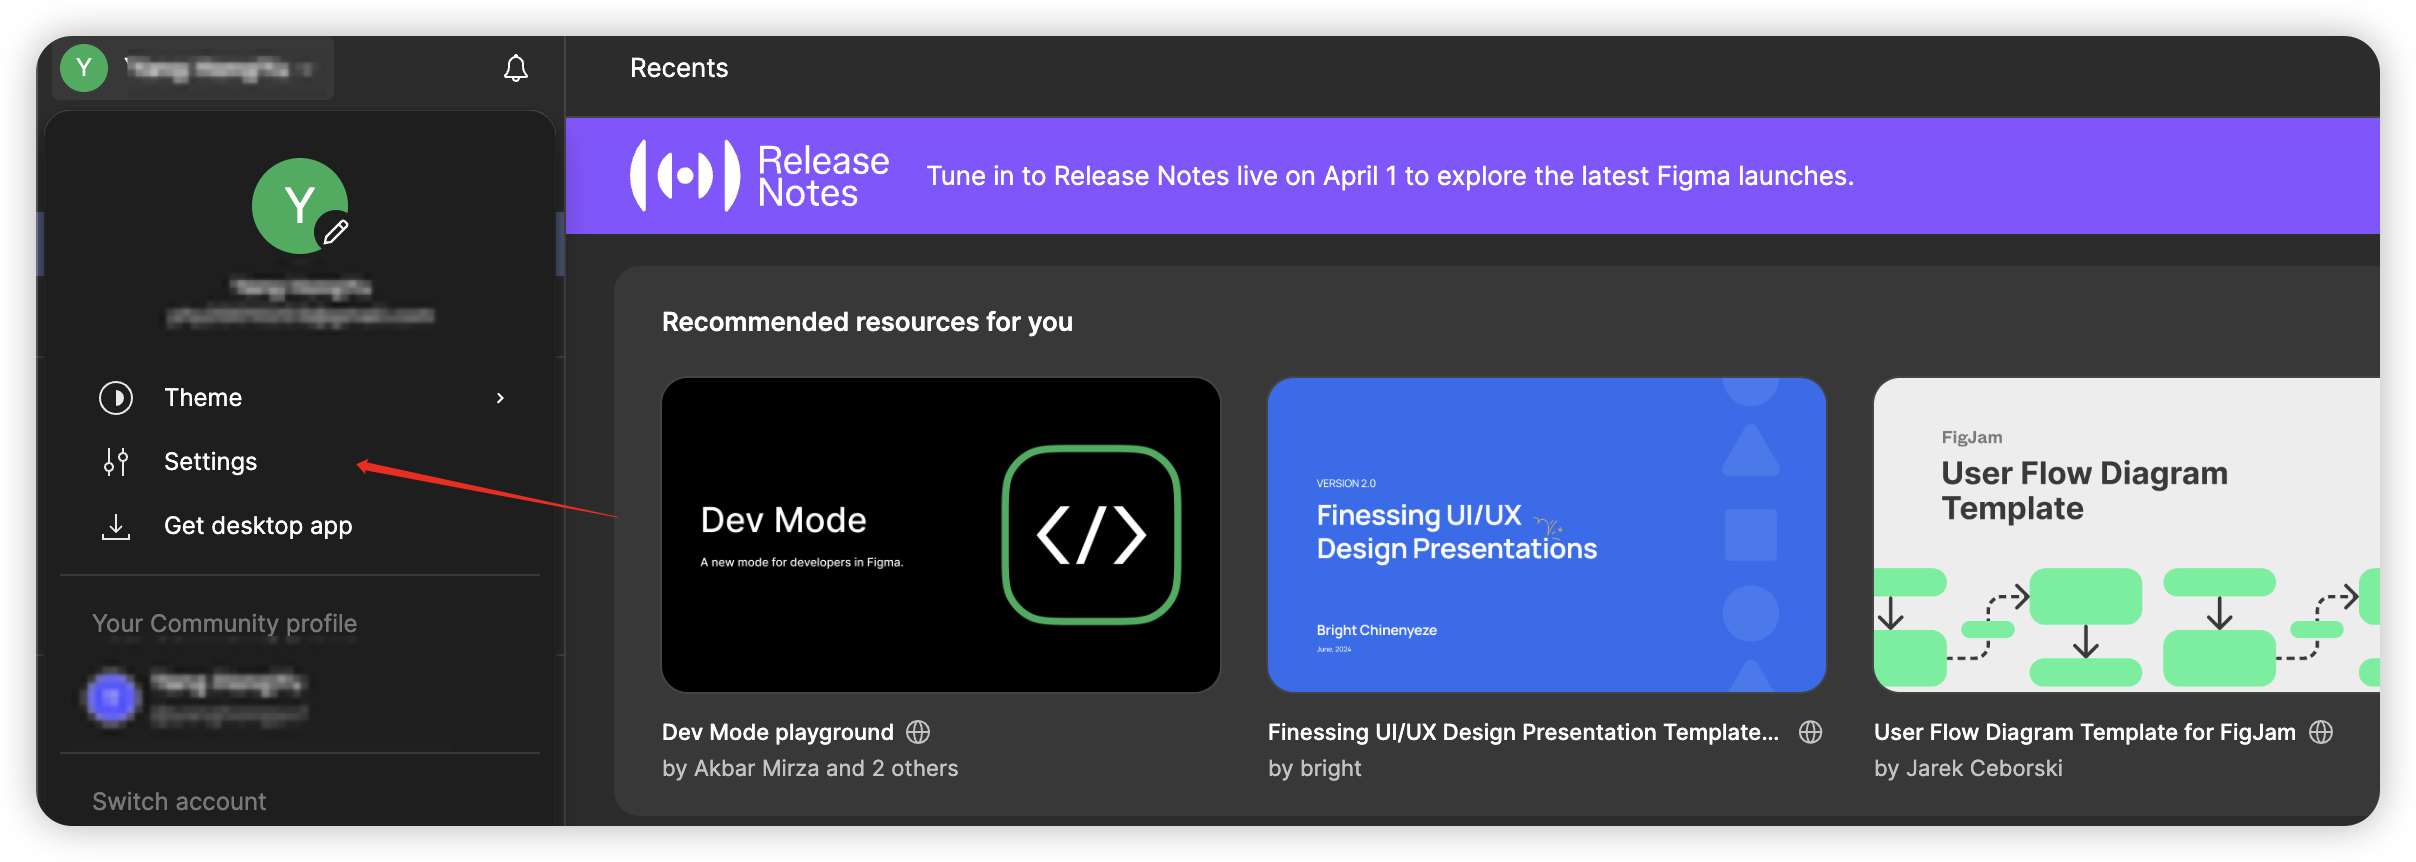
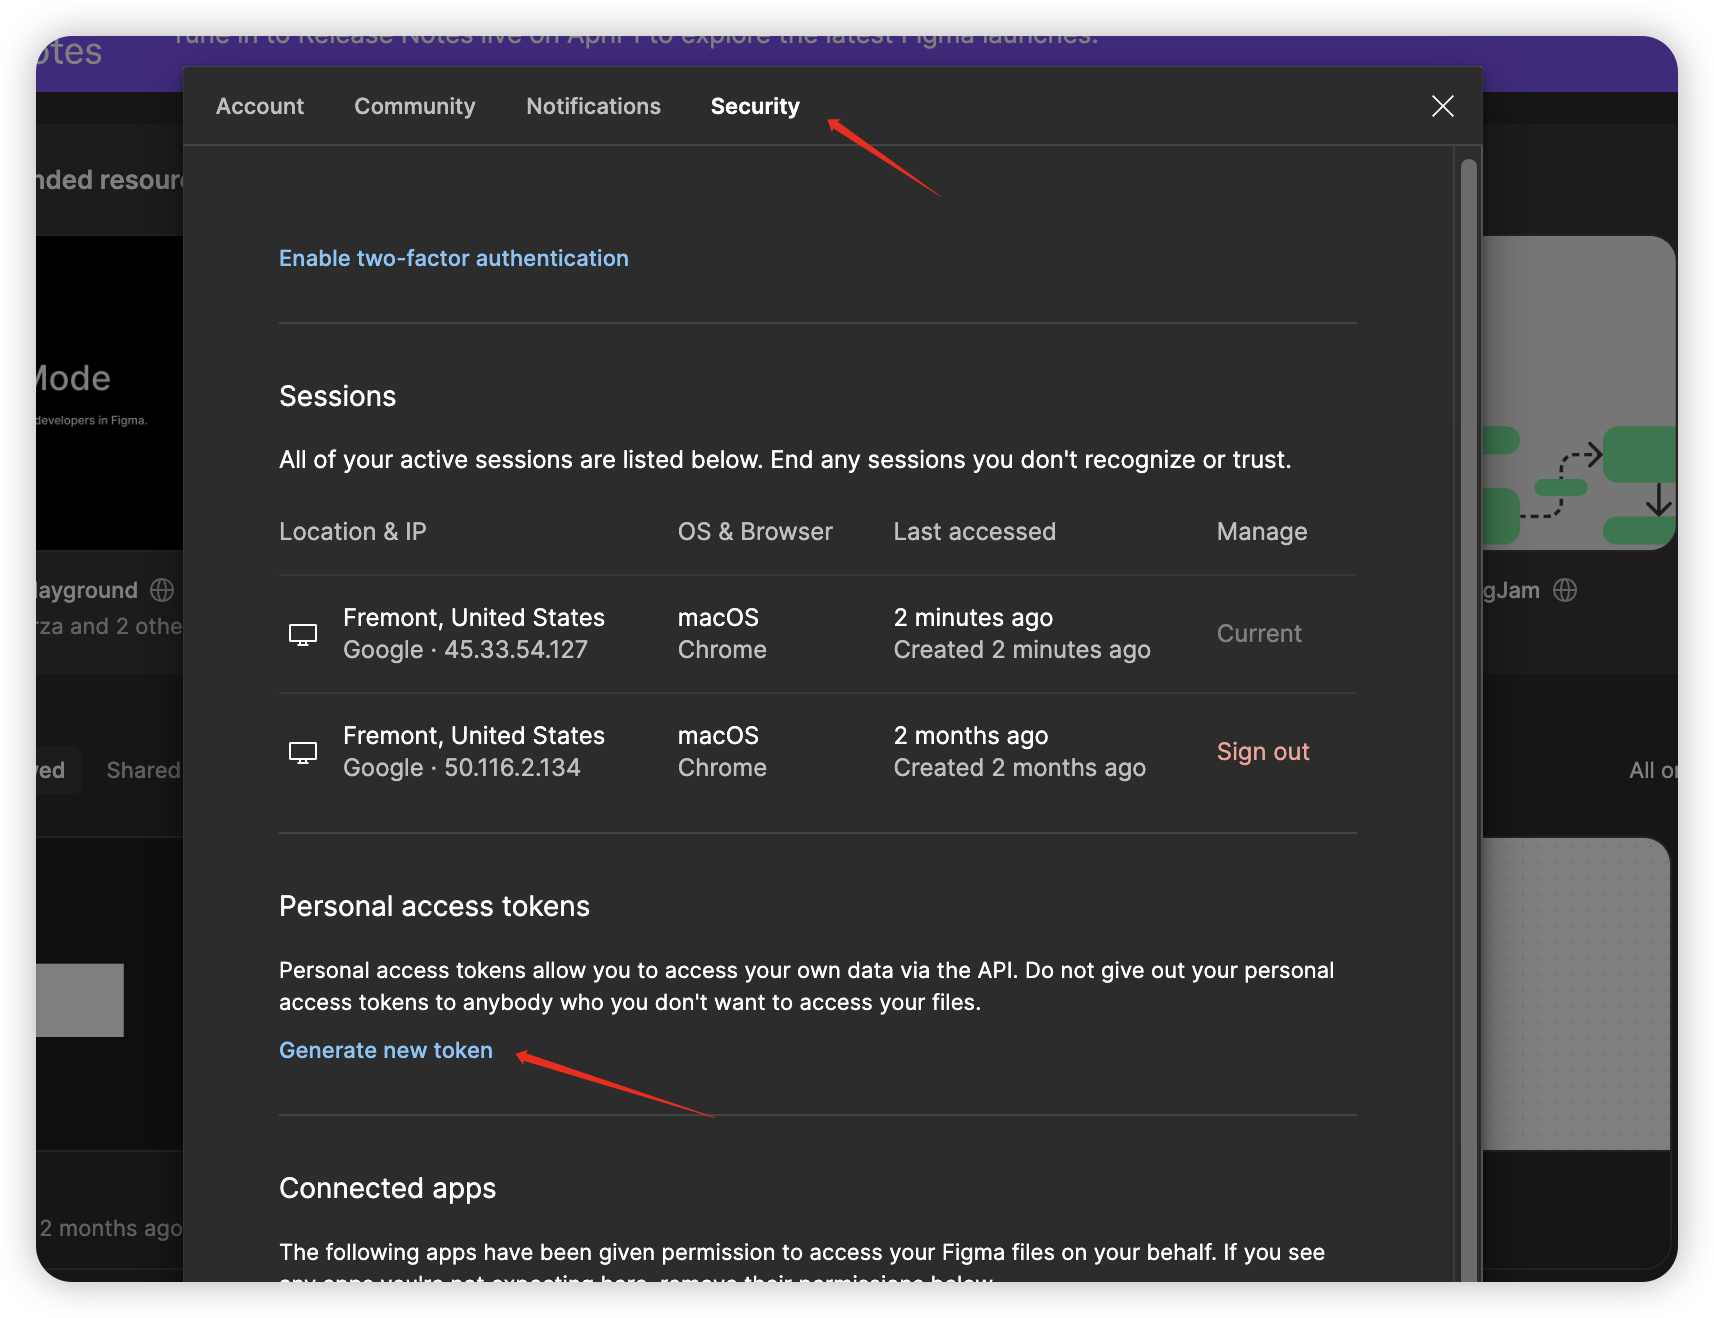
- Find Security Options: In the settings menu, navigate to the “Security” tab
- Generate Access Token:
- Scroll to the “Personal Access Tokens” section
- Click “Generate New Token”
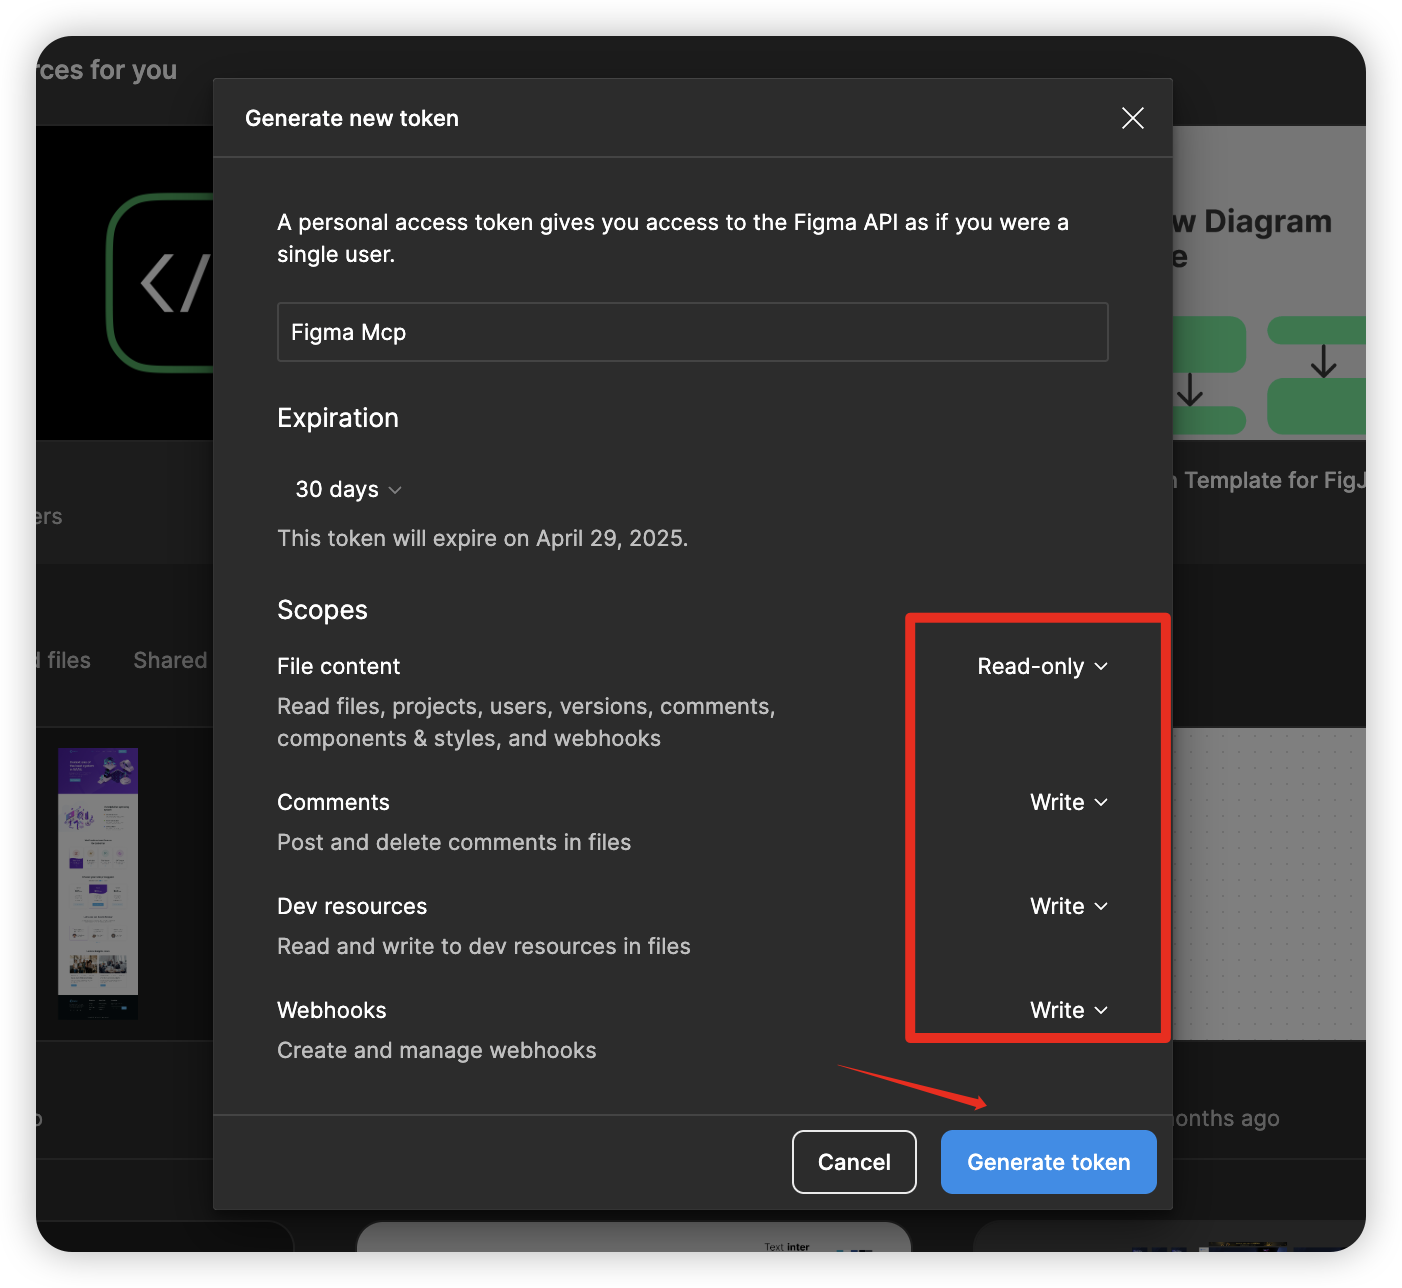
- Provide a descriptive name for the token (e.g., “Figma_MCP_Integration”)
- Click “Create” to generate the token
- Securely Save the Token: Figma will only display the token once, so copy and store it securely
Figma-MCP Installation Methods
Depending on your needs, you can choose one of the following two installation methods:
Method 1: Quick Start with NPX (Recommended)
This is the simplest method, no need to clone the code repository:
You can also use pnpx, yarn dlx, or bunx to perform the same operation.
Method 2: Install from Source Code
For users who need customization or want to contribute code:
Server Configuration Options
There are two main ways to configure the Figma-MCP server:
1. Environment Variables: Set the following variables in the .env file:
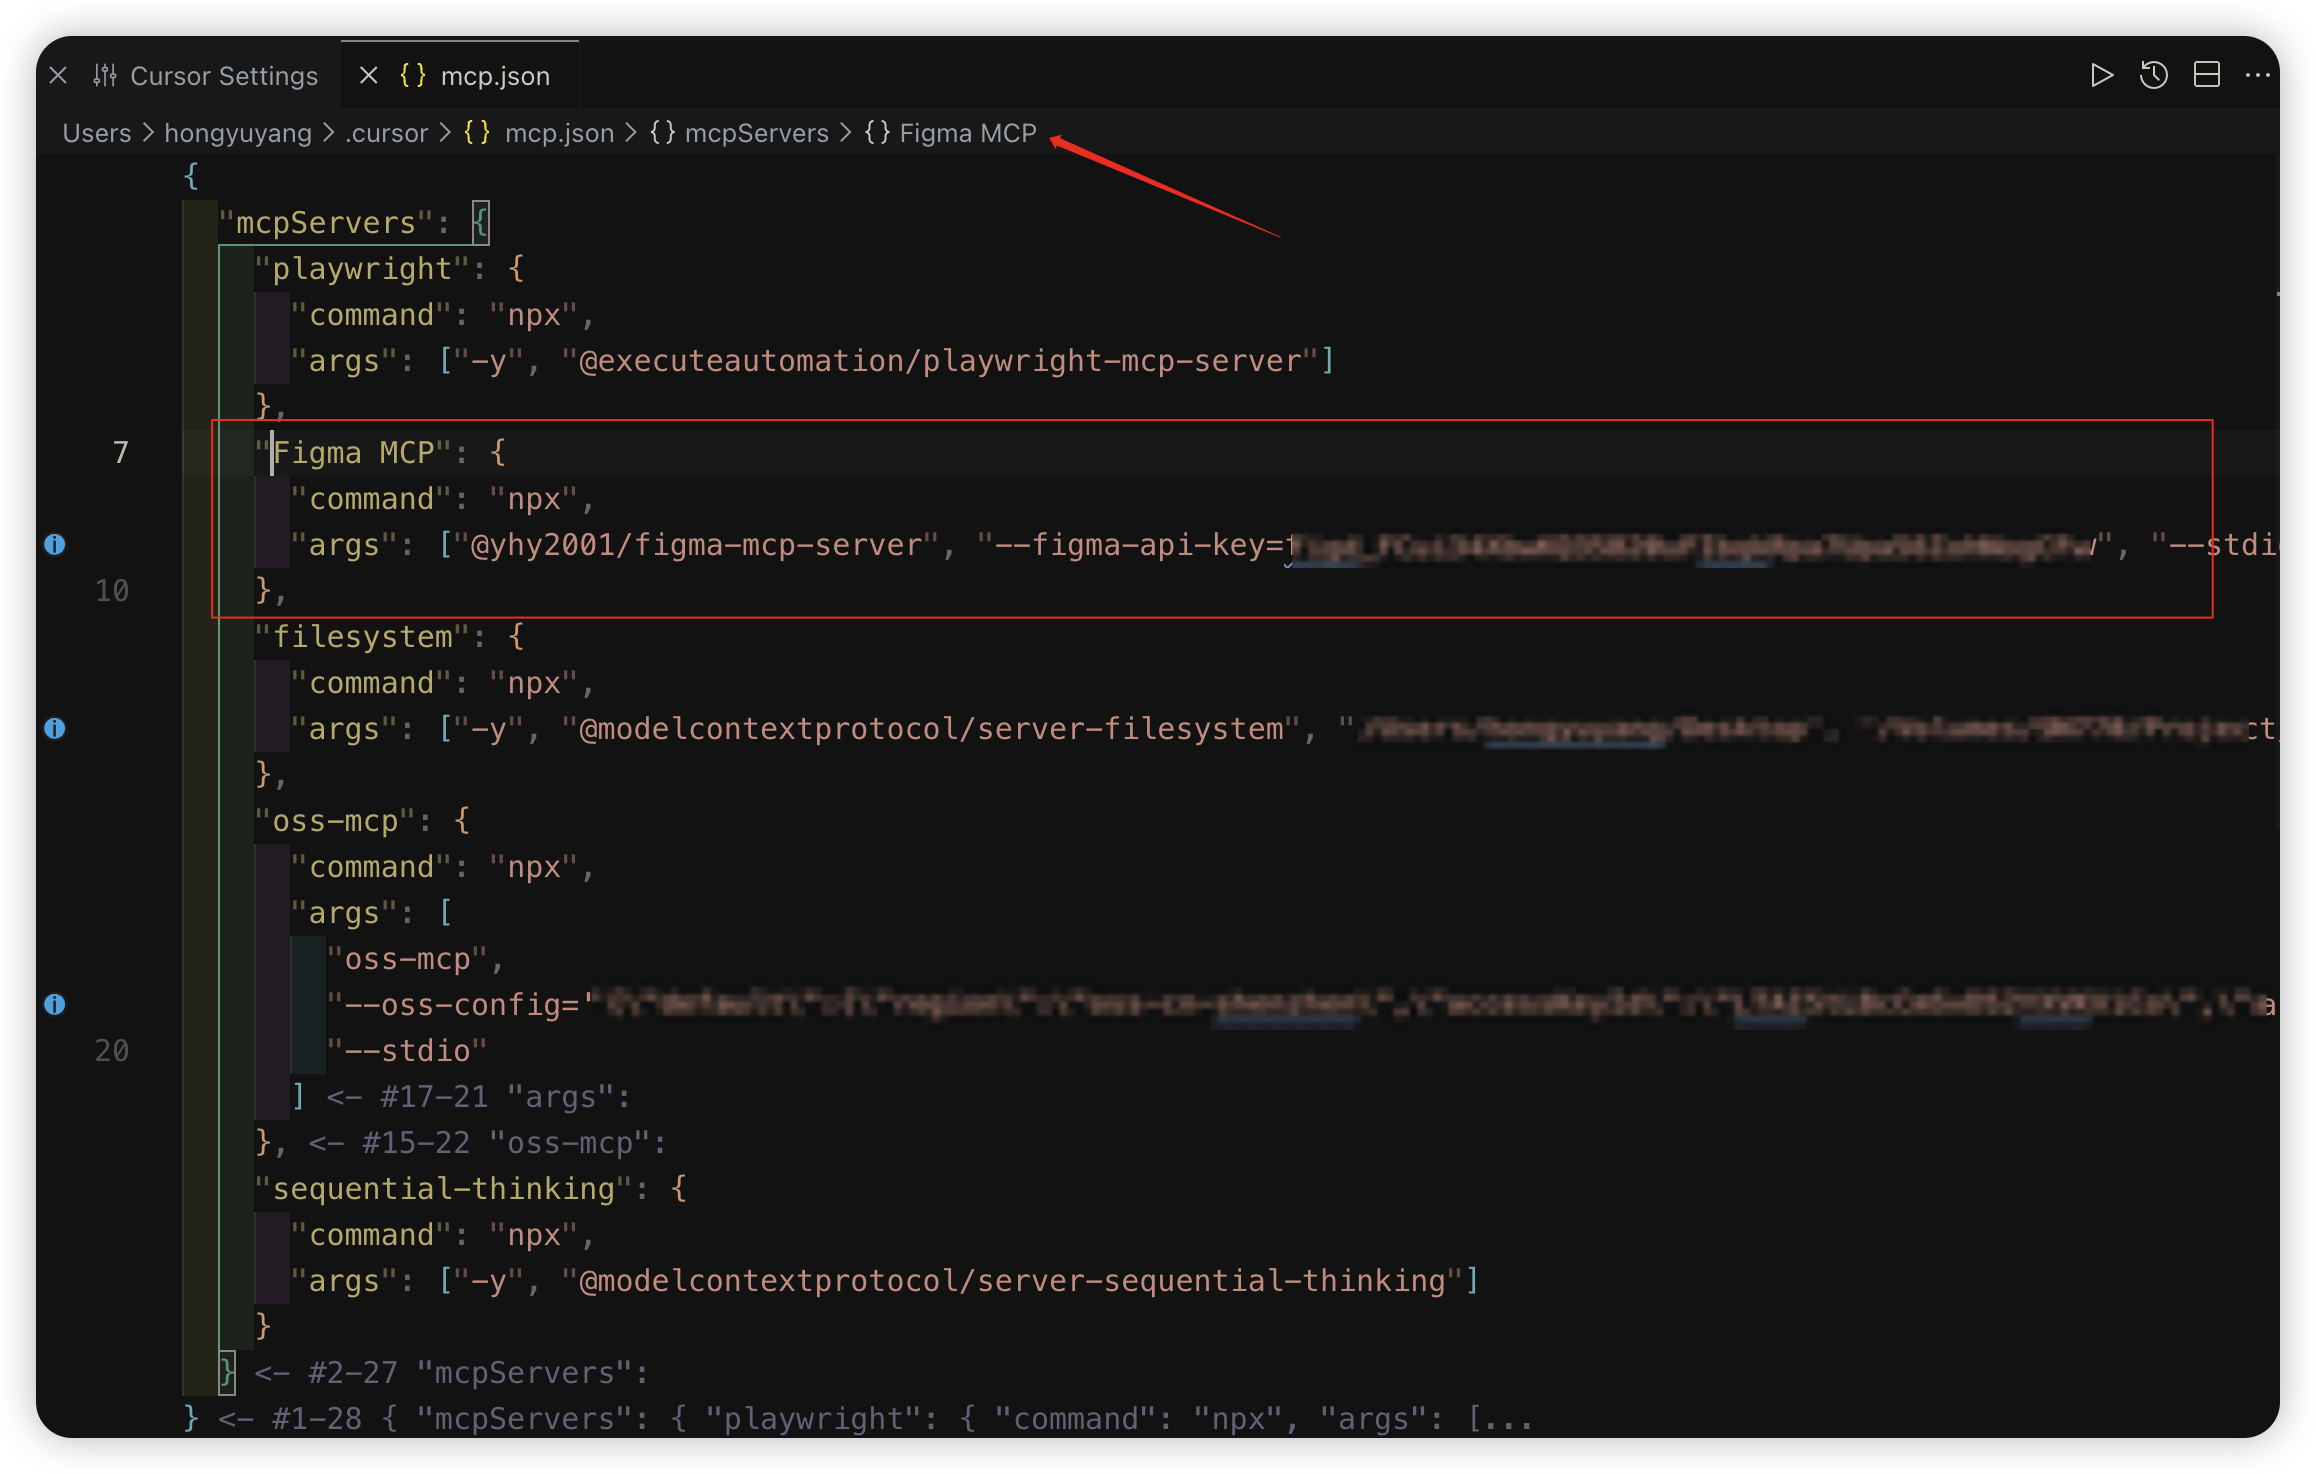
2. Command Line Arguments: Pass parameters directly when starting:
Command line arguments take precedence over environment variables, making them suitable for temporary configuration changes.
IV. Integrating Figma-MCP with Cursor
Cursor IDE Connection Configuration
1. Confirm MCP Server Status
First, ensure your Figma-MCP server is running and listening on the correct port (default is 3333). You can verify the server status by accessing http://localhost:3333 in your browser.
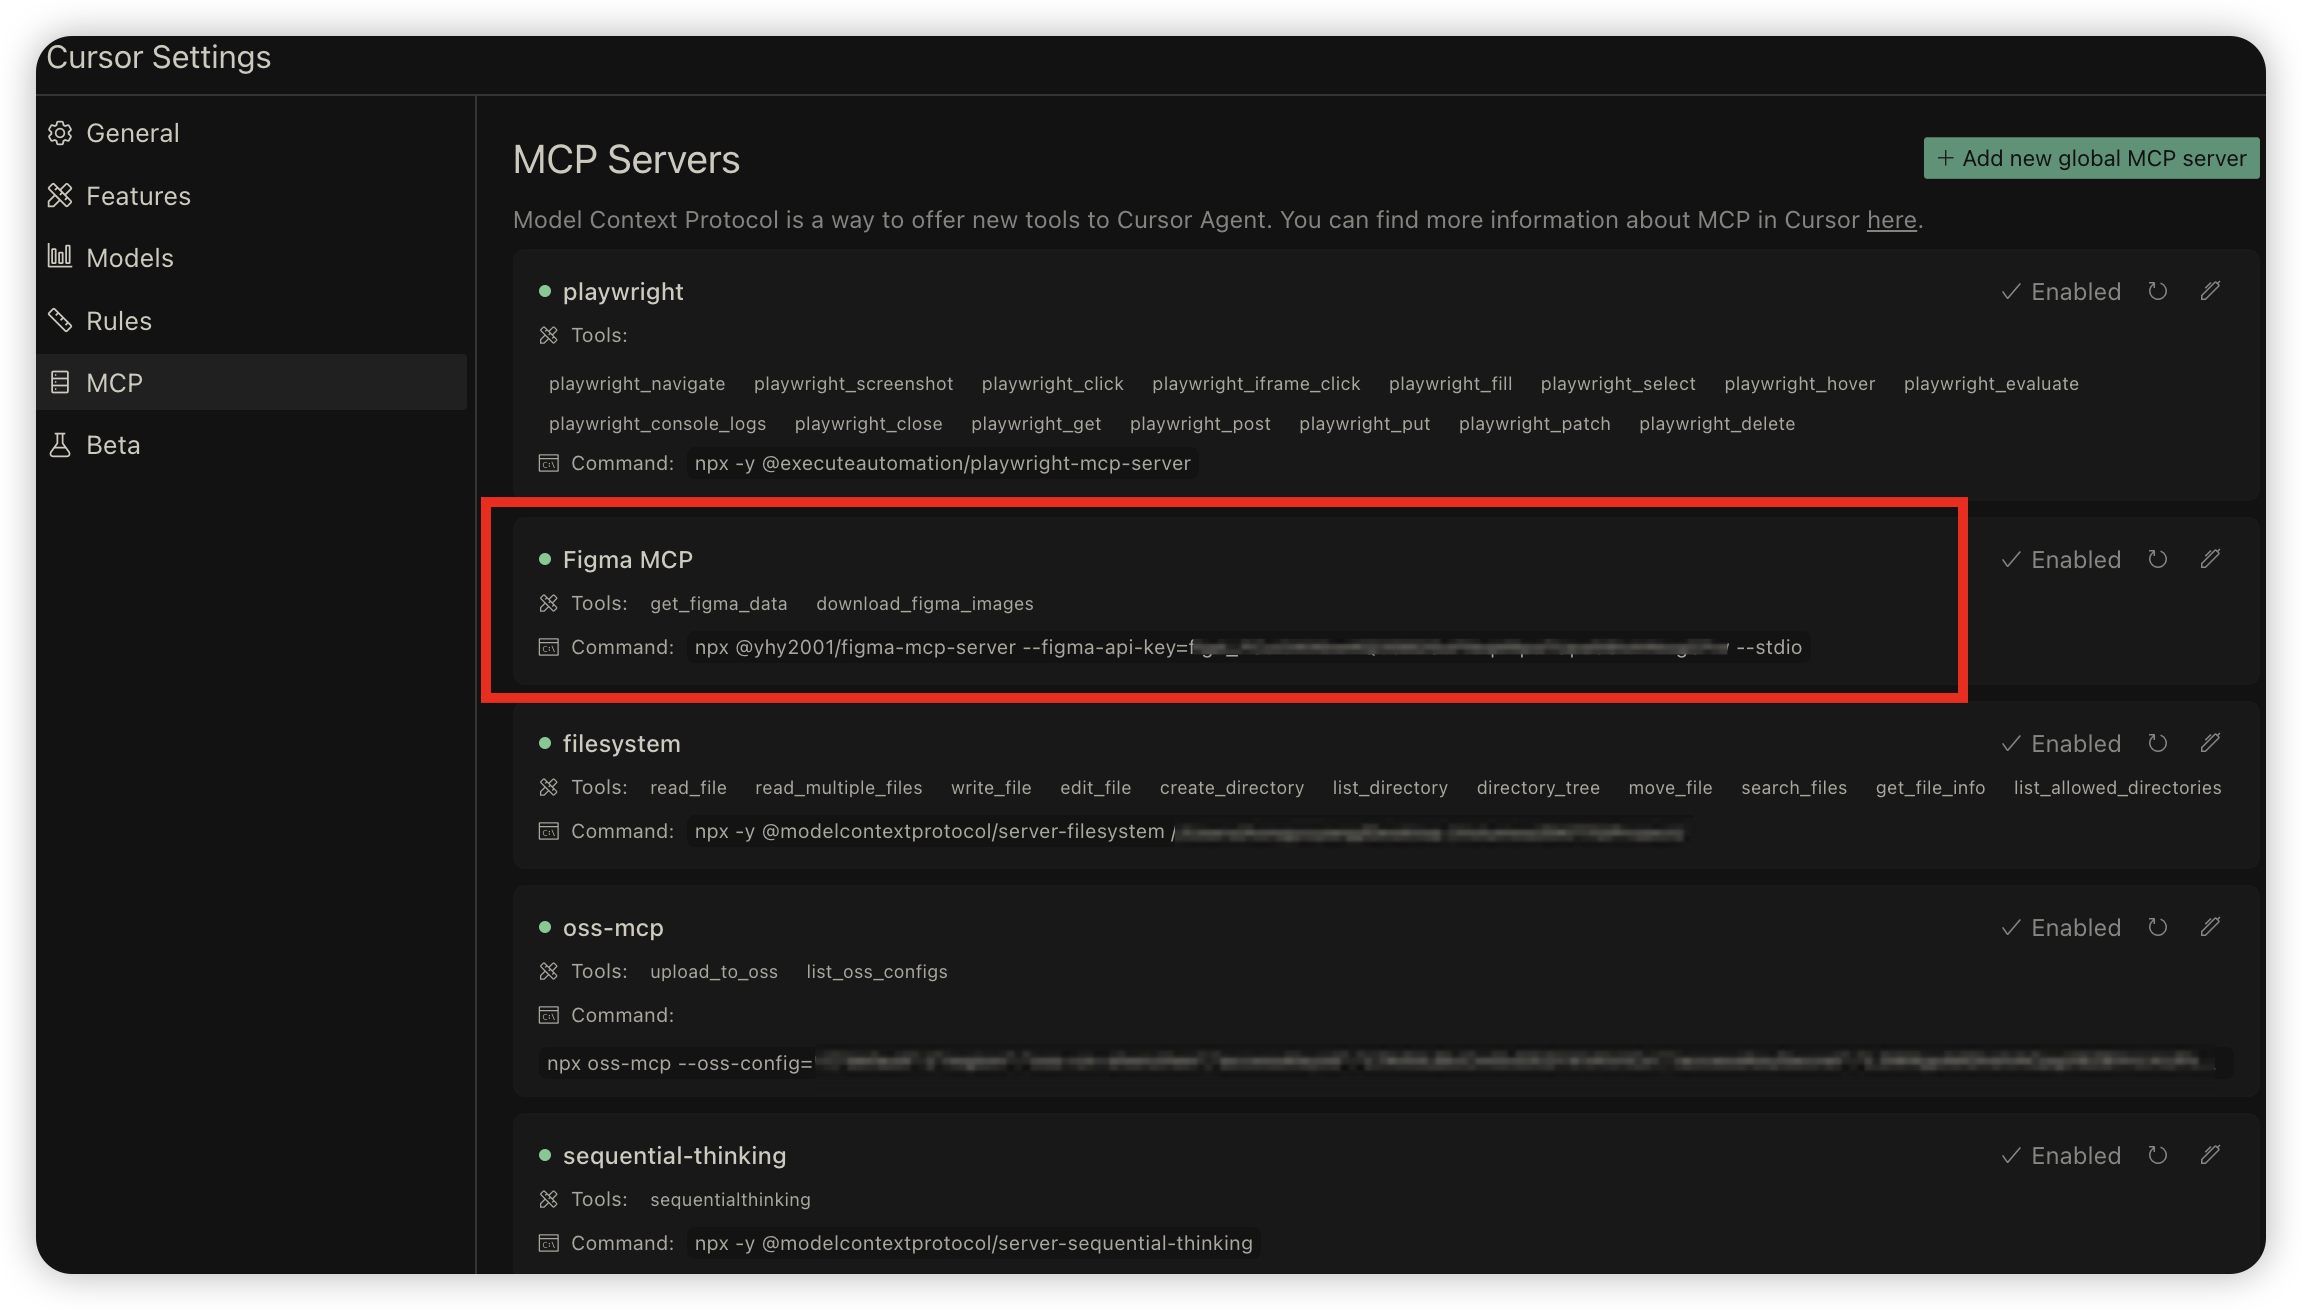
2. Add MCP Server in Cursor
- Launch Cursor IDE
- Open the settings menu (usually in the top right corner or via keyboard shortcut)
- Navigate to the MCP settings section
- Click Add New MCP Server
- Fill in the server information:
- Name: Any descriptive name (like “Figma MCP”)
- Type: Select SSE (Server-Sent Events)
- URL: Enter the server address (e.g.,
http://localhost:3333)
- Save the settings
After successful connection, a green status indicator will appear next to the server name. A red indicator signals connection failure, requiring you to check your configuration or server status.
Using Figma-MCP to Generate Code
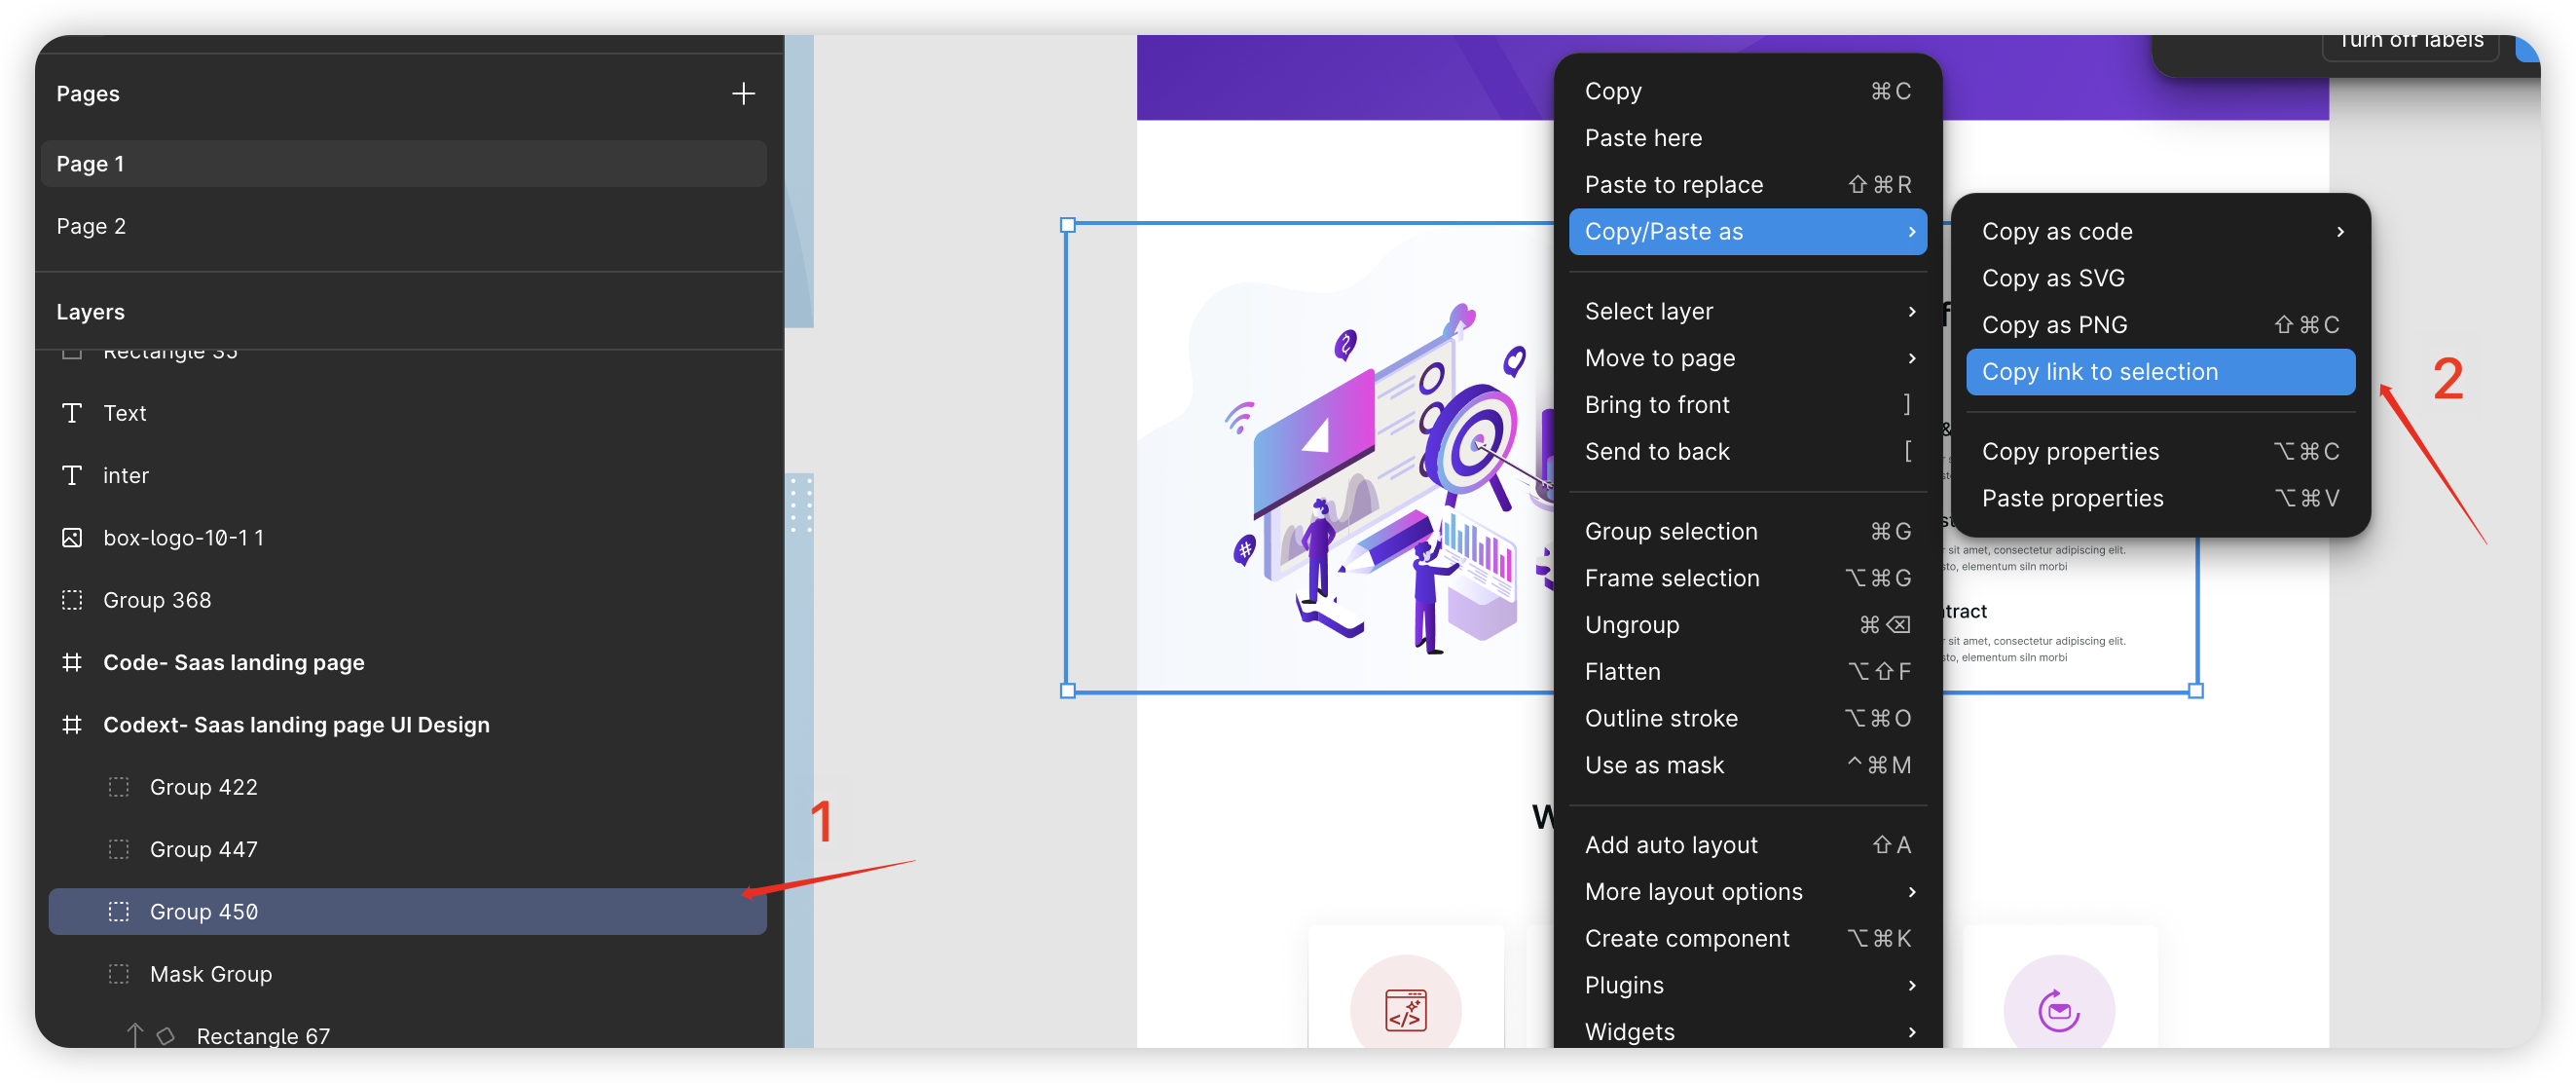
Getting the Figma Design Link
- Open your Figma project and select the design element you want to implement
- Right-click on the selected design > Choose Copy/Paste As > Select Copy Link to Selection
- This link contains the exact reference to the design, allowing AI to access it through MCP
Using Cursor Composer to Generate Code
- Open the Composer panel in Cursor
- Enable Agent Mode (this allows the AI to use tools, including the MCP server)
- Paste the previously copied Figma link
- Enter specific instructions, such as:
- “Implement this design using React and Tailwind CSS”
- “Generate Vue 3 code for this navigation bar component”
- “Analyze this design and create a component library structure”
Cursor will access the Figma design through the MCP server, analyze its structure, styles, and properties, and then generate code that meets the design specifications.
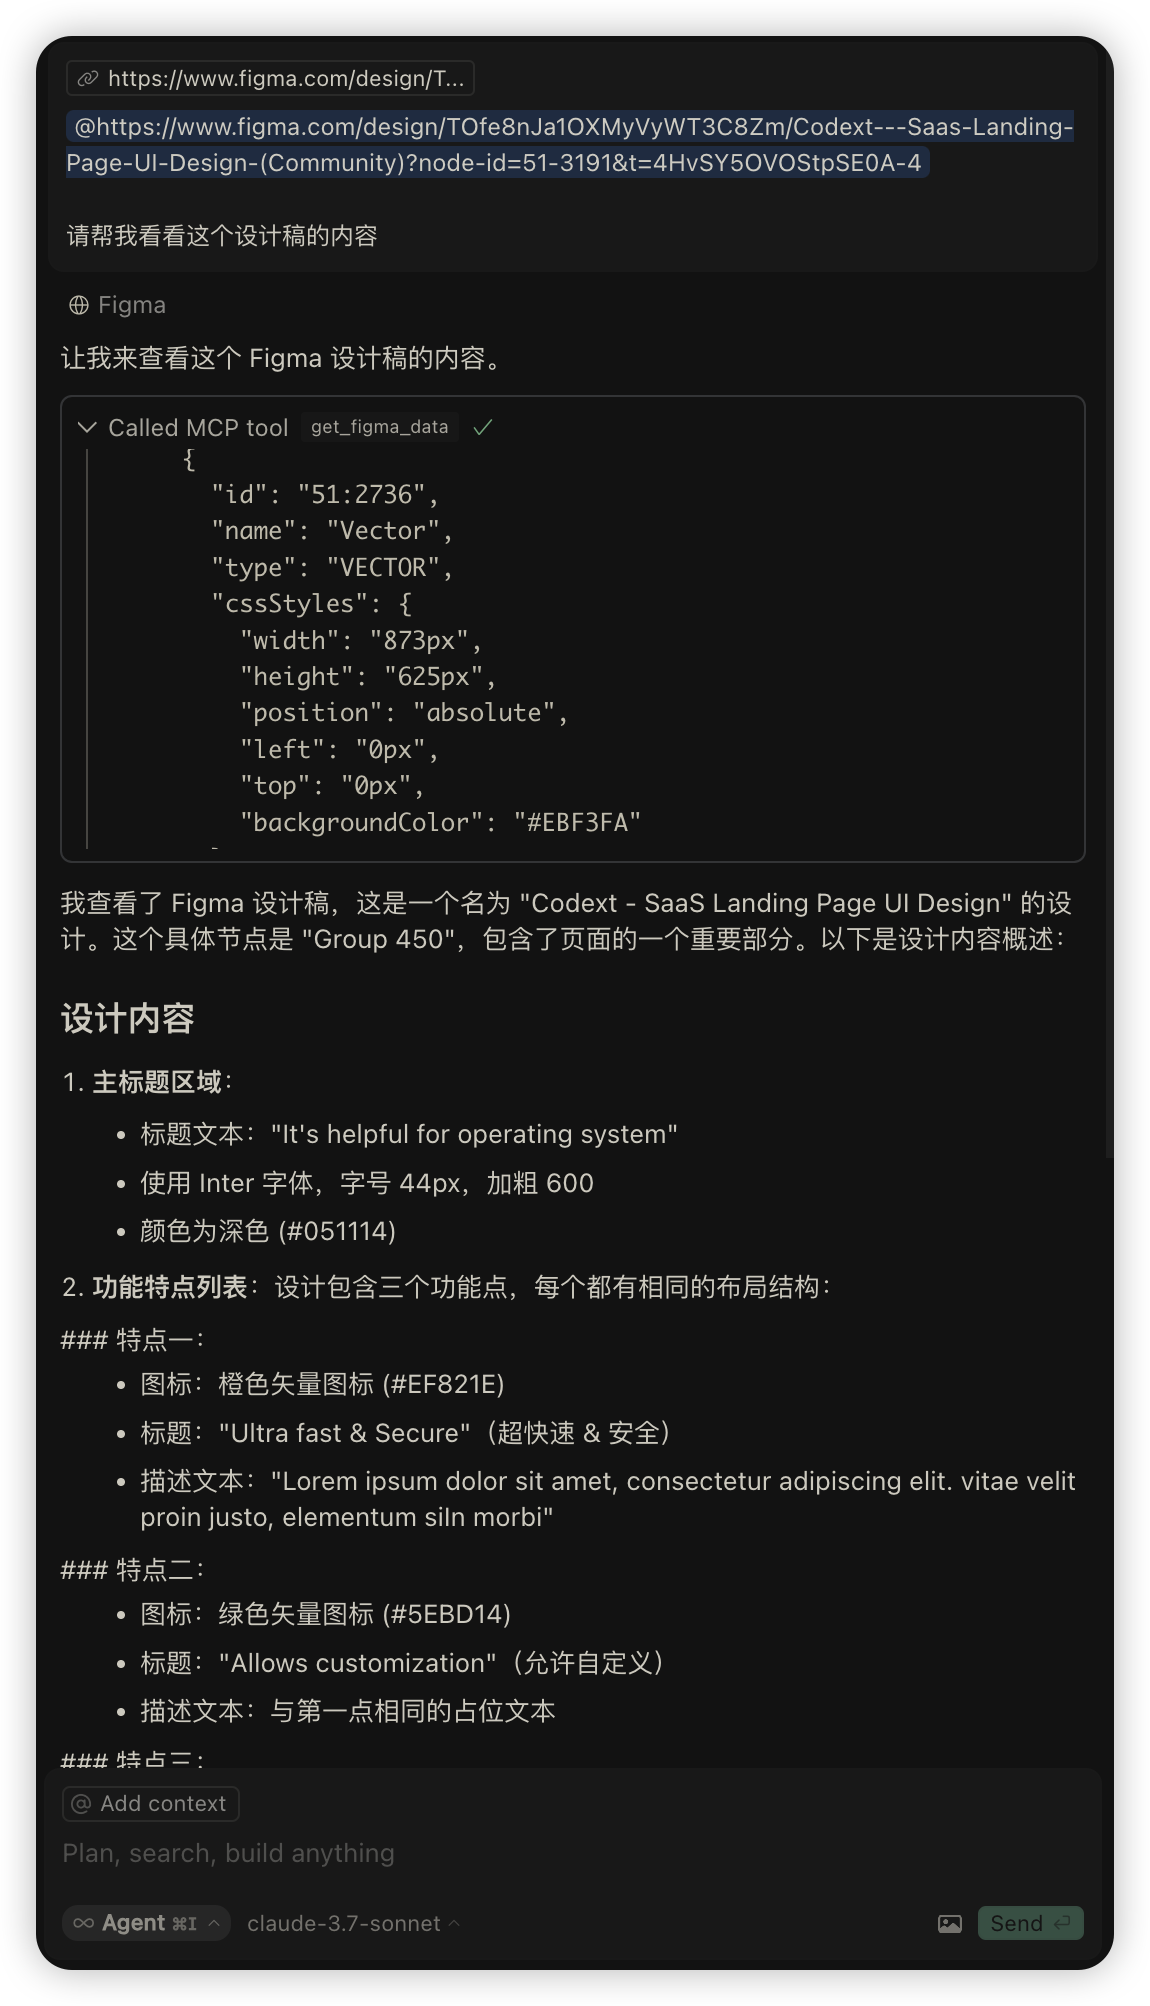
Figma-MCP Interface Response Format
The JSON format returned by the MCP tool for design files is as follows. After Cursor receives it, it generates code based on the design:
Built-in Tools
The server provides the following MCP tools:
get_figma_data Retrieves information about a Figma file or specific node.
Parameters:
- fileKey: The key of the Figma file
- nodeId: Node ID (strongly recommended)
- depth: Depth to traverse the node tree
download_figma_images Downloads images and icon resources from a Figma file.
Parameters:
- fileKey: The key of the Figma file containing the nodes
- nodes: Array of image nodes to fetch
- localPath: Directory path in the project to store images