Master the complete process of n8n private deployment
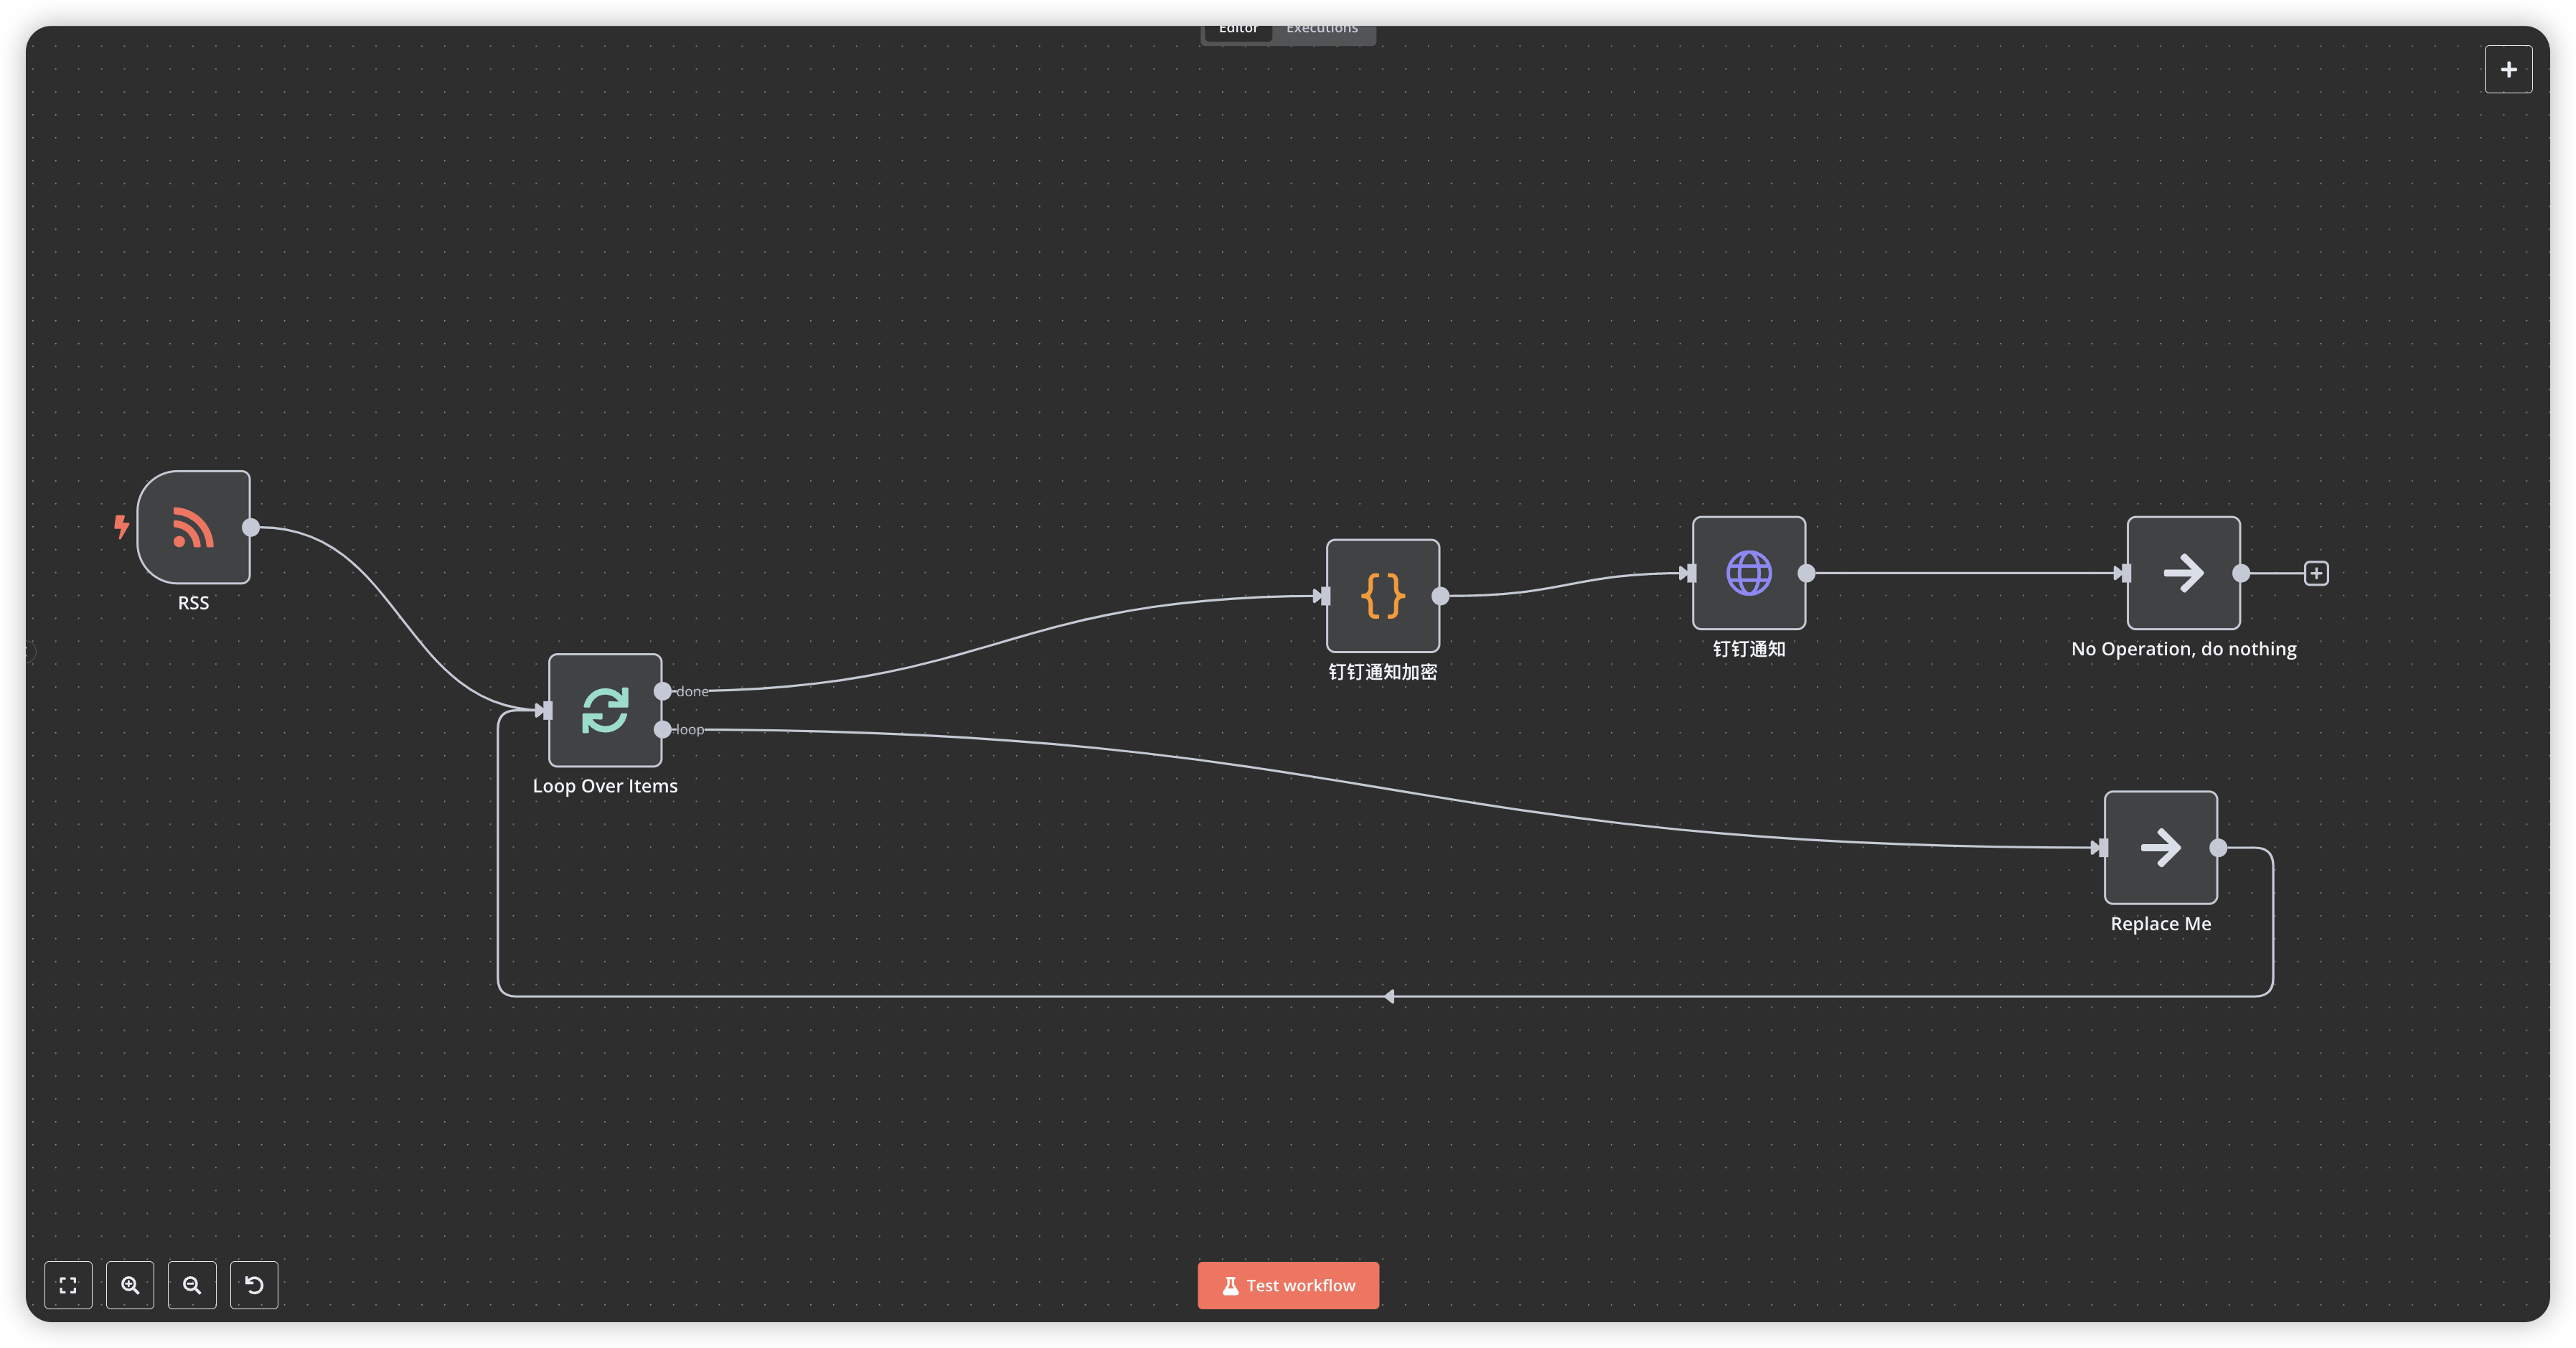
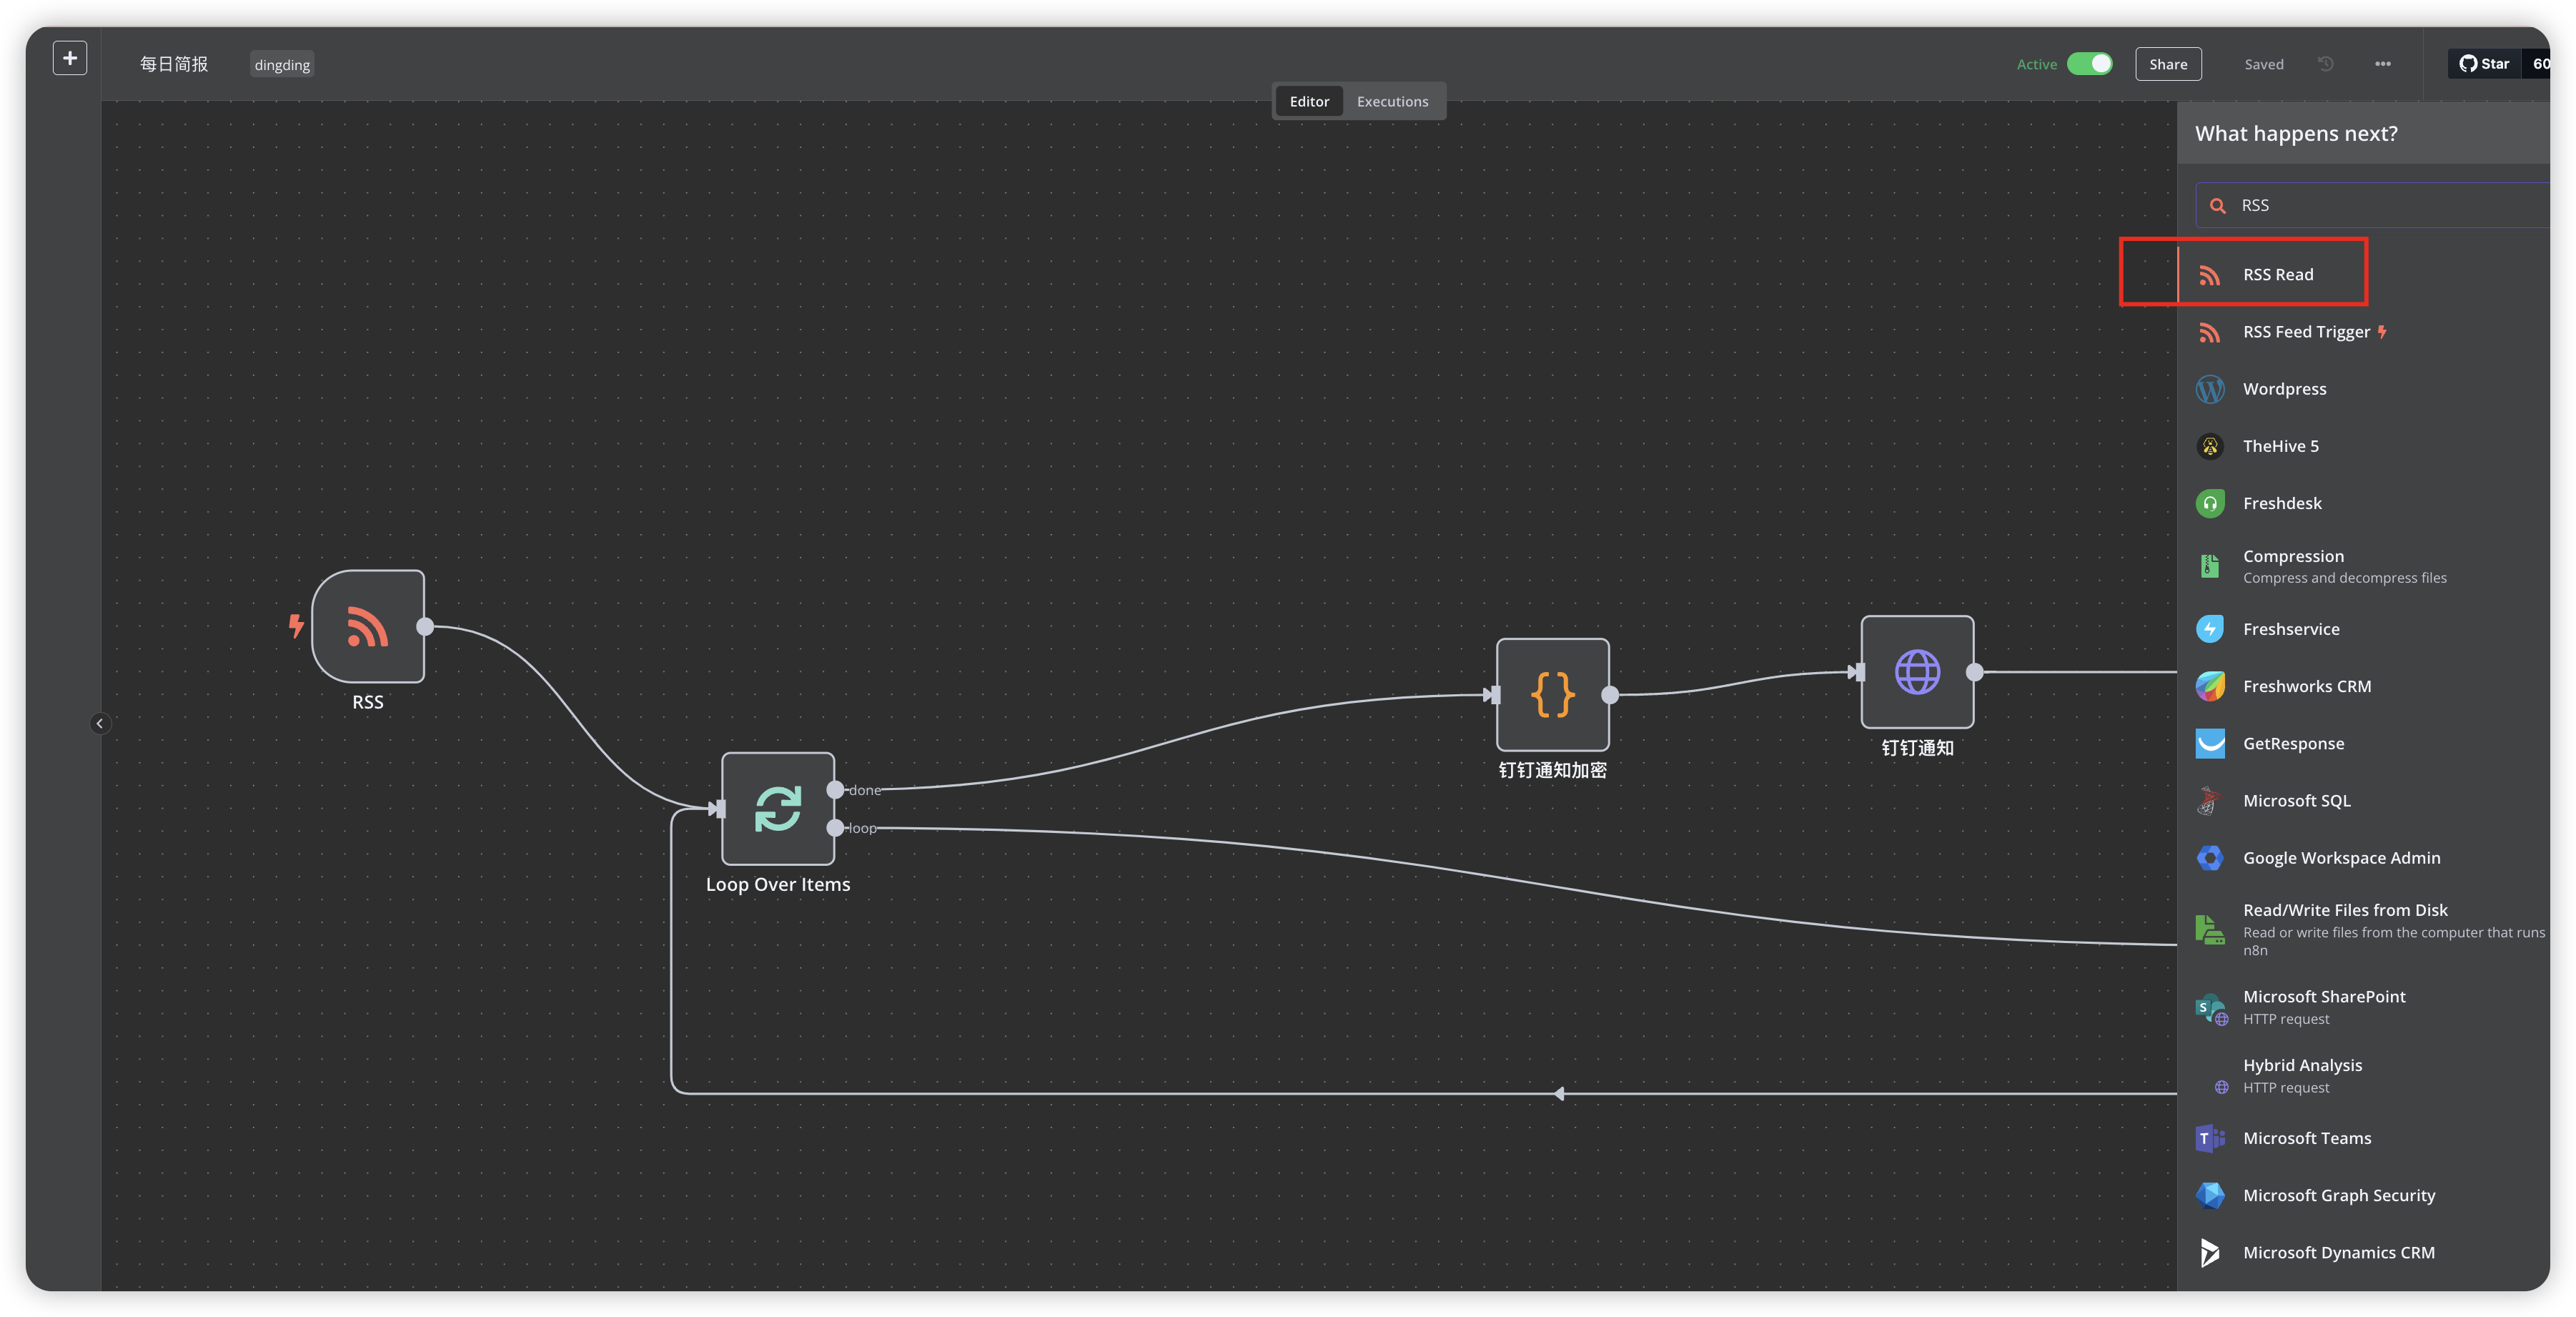
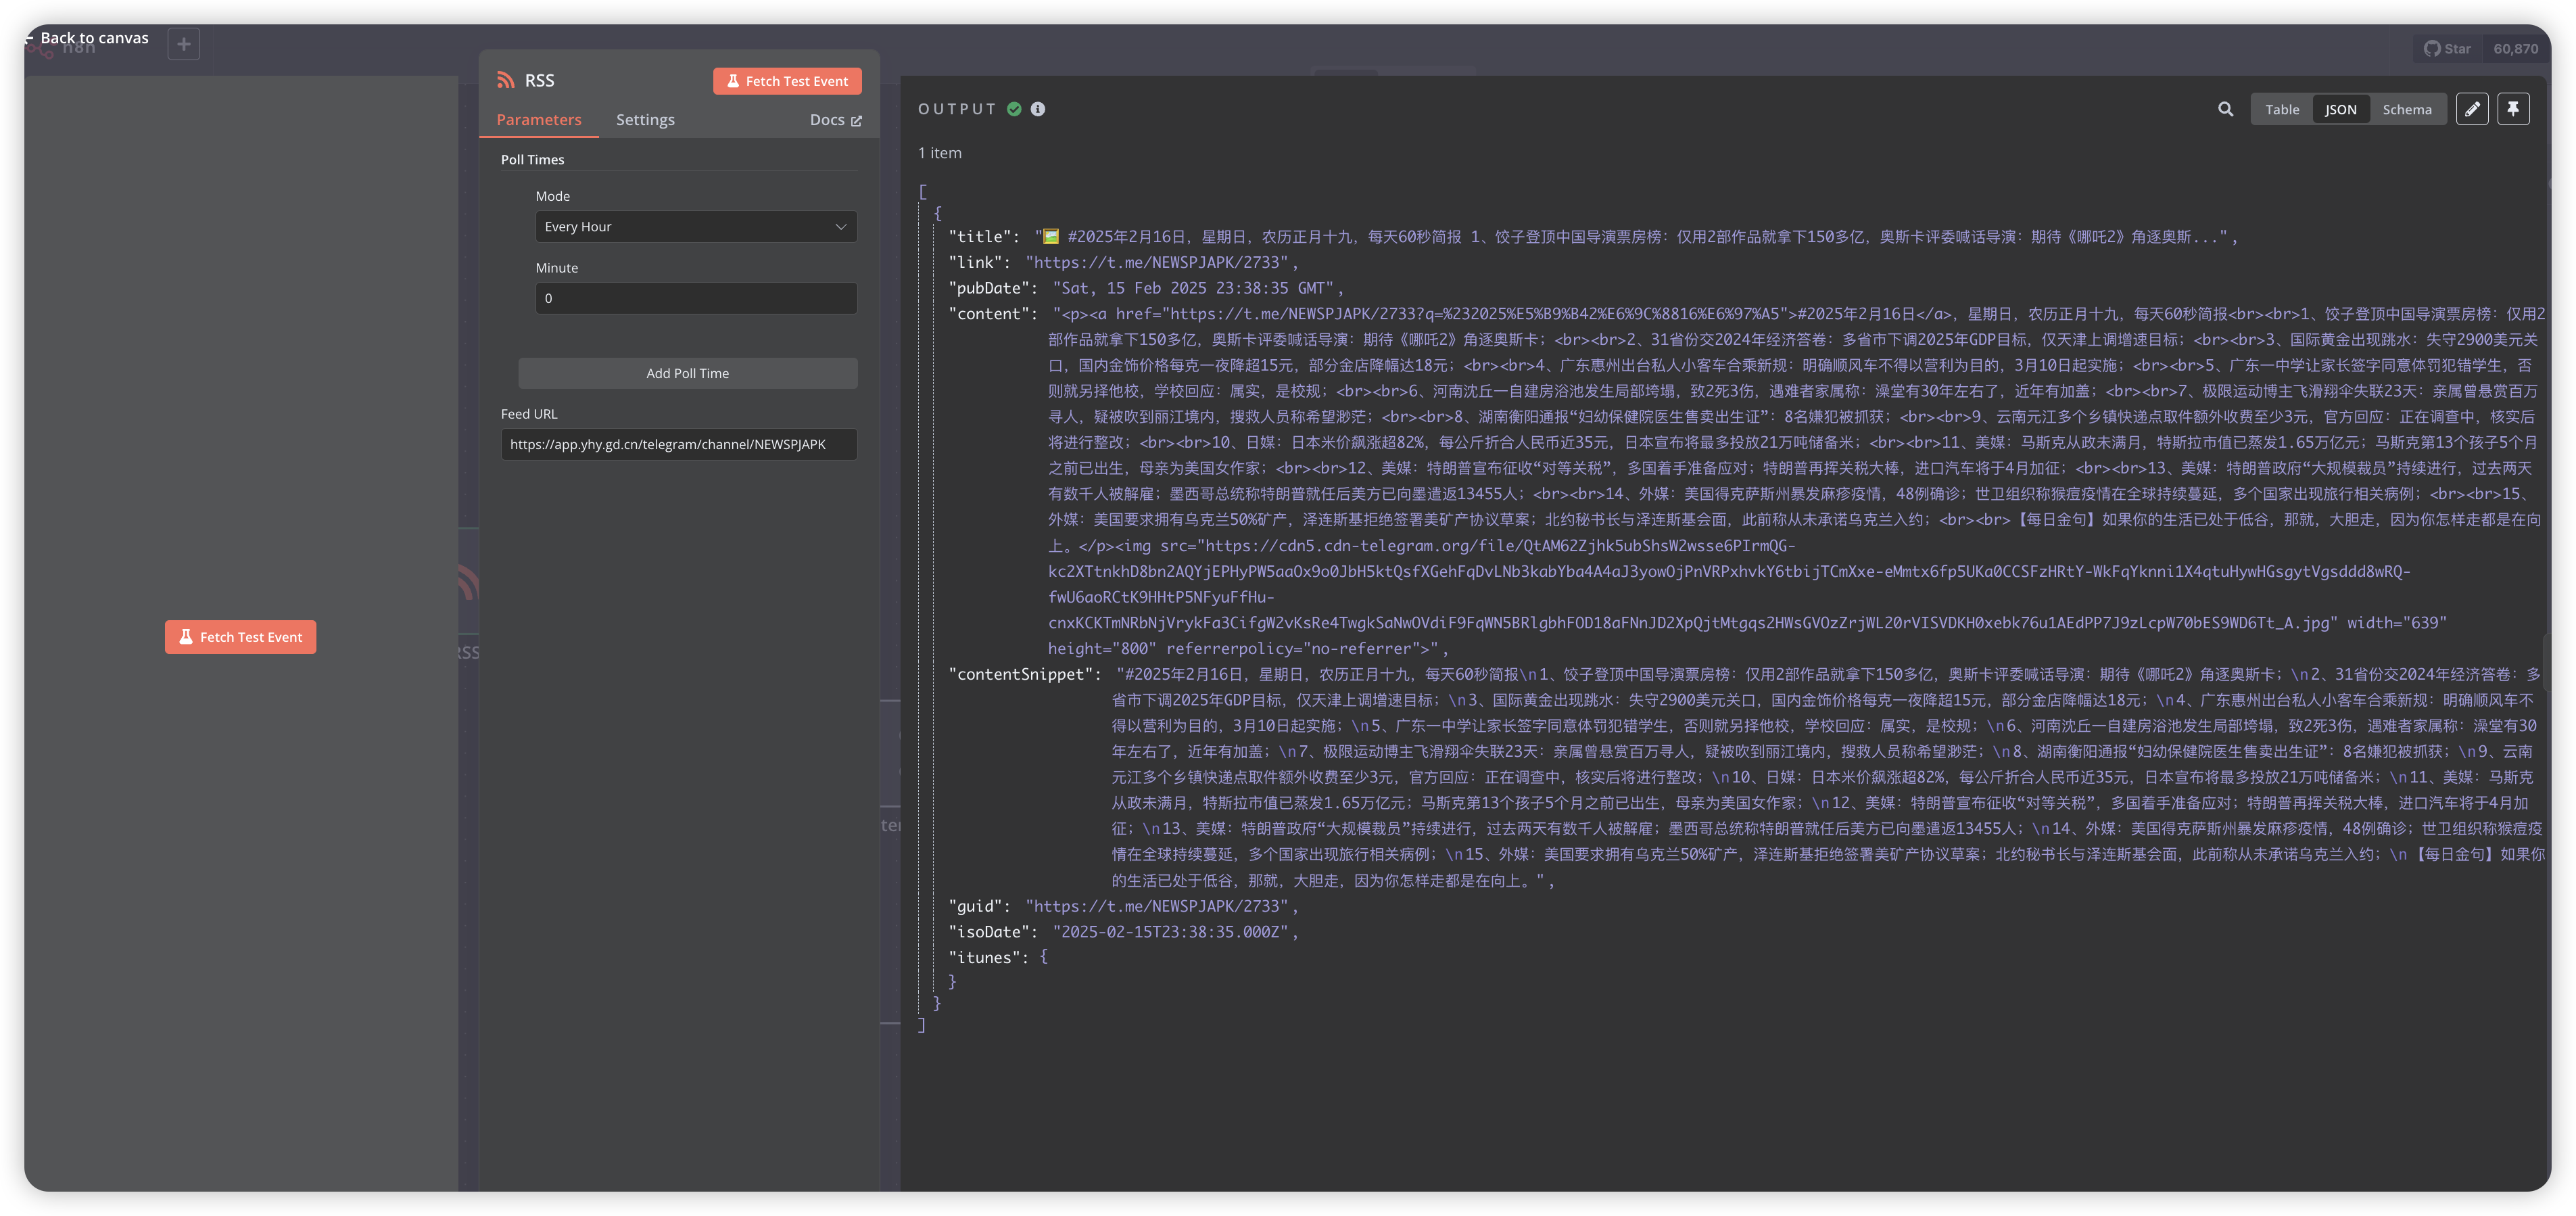
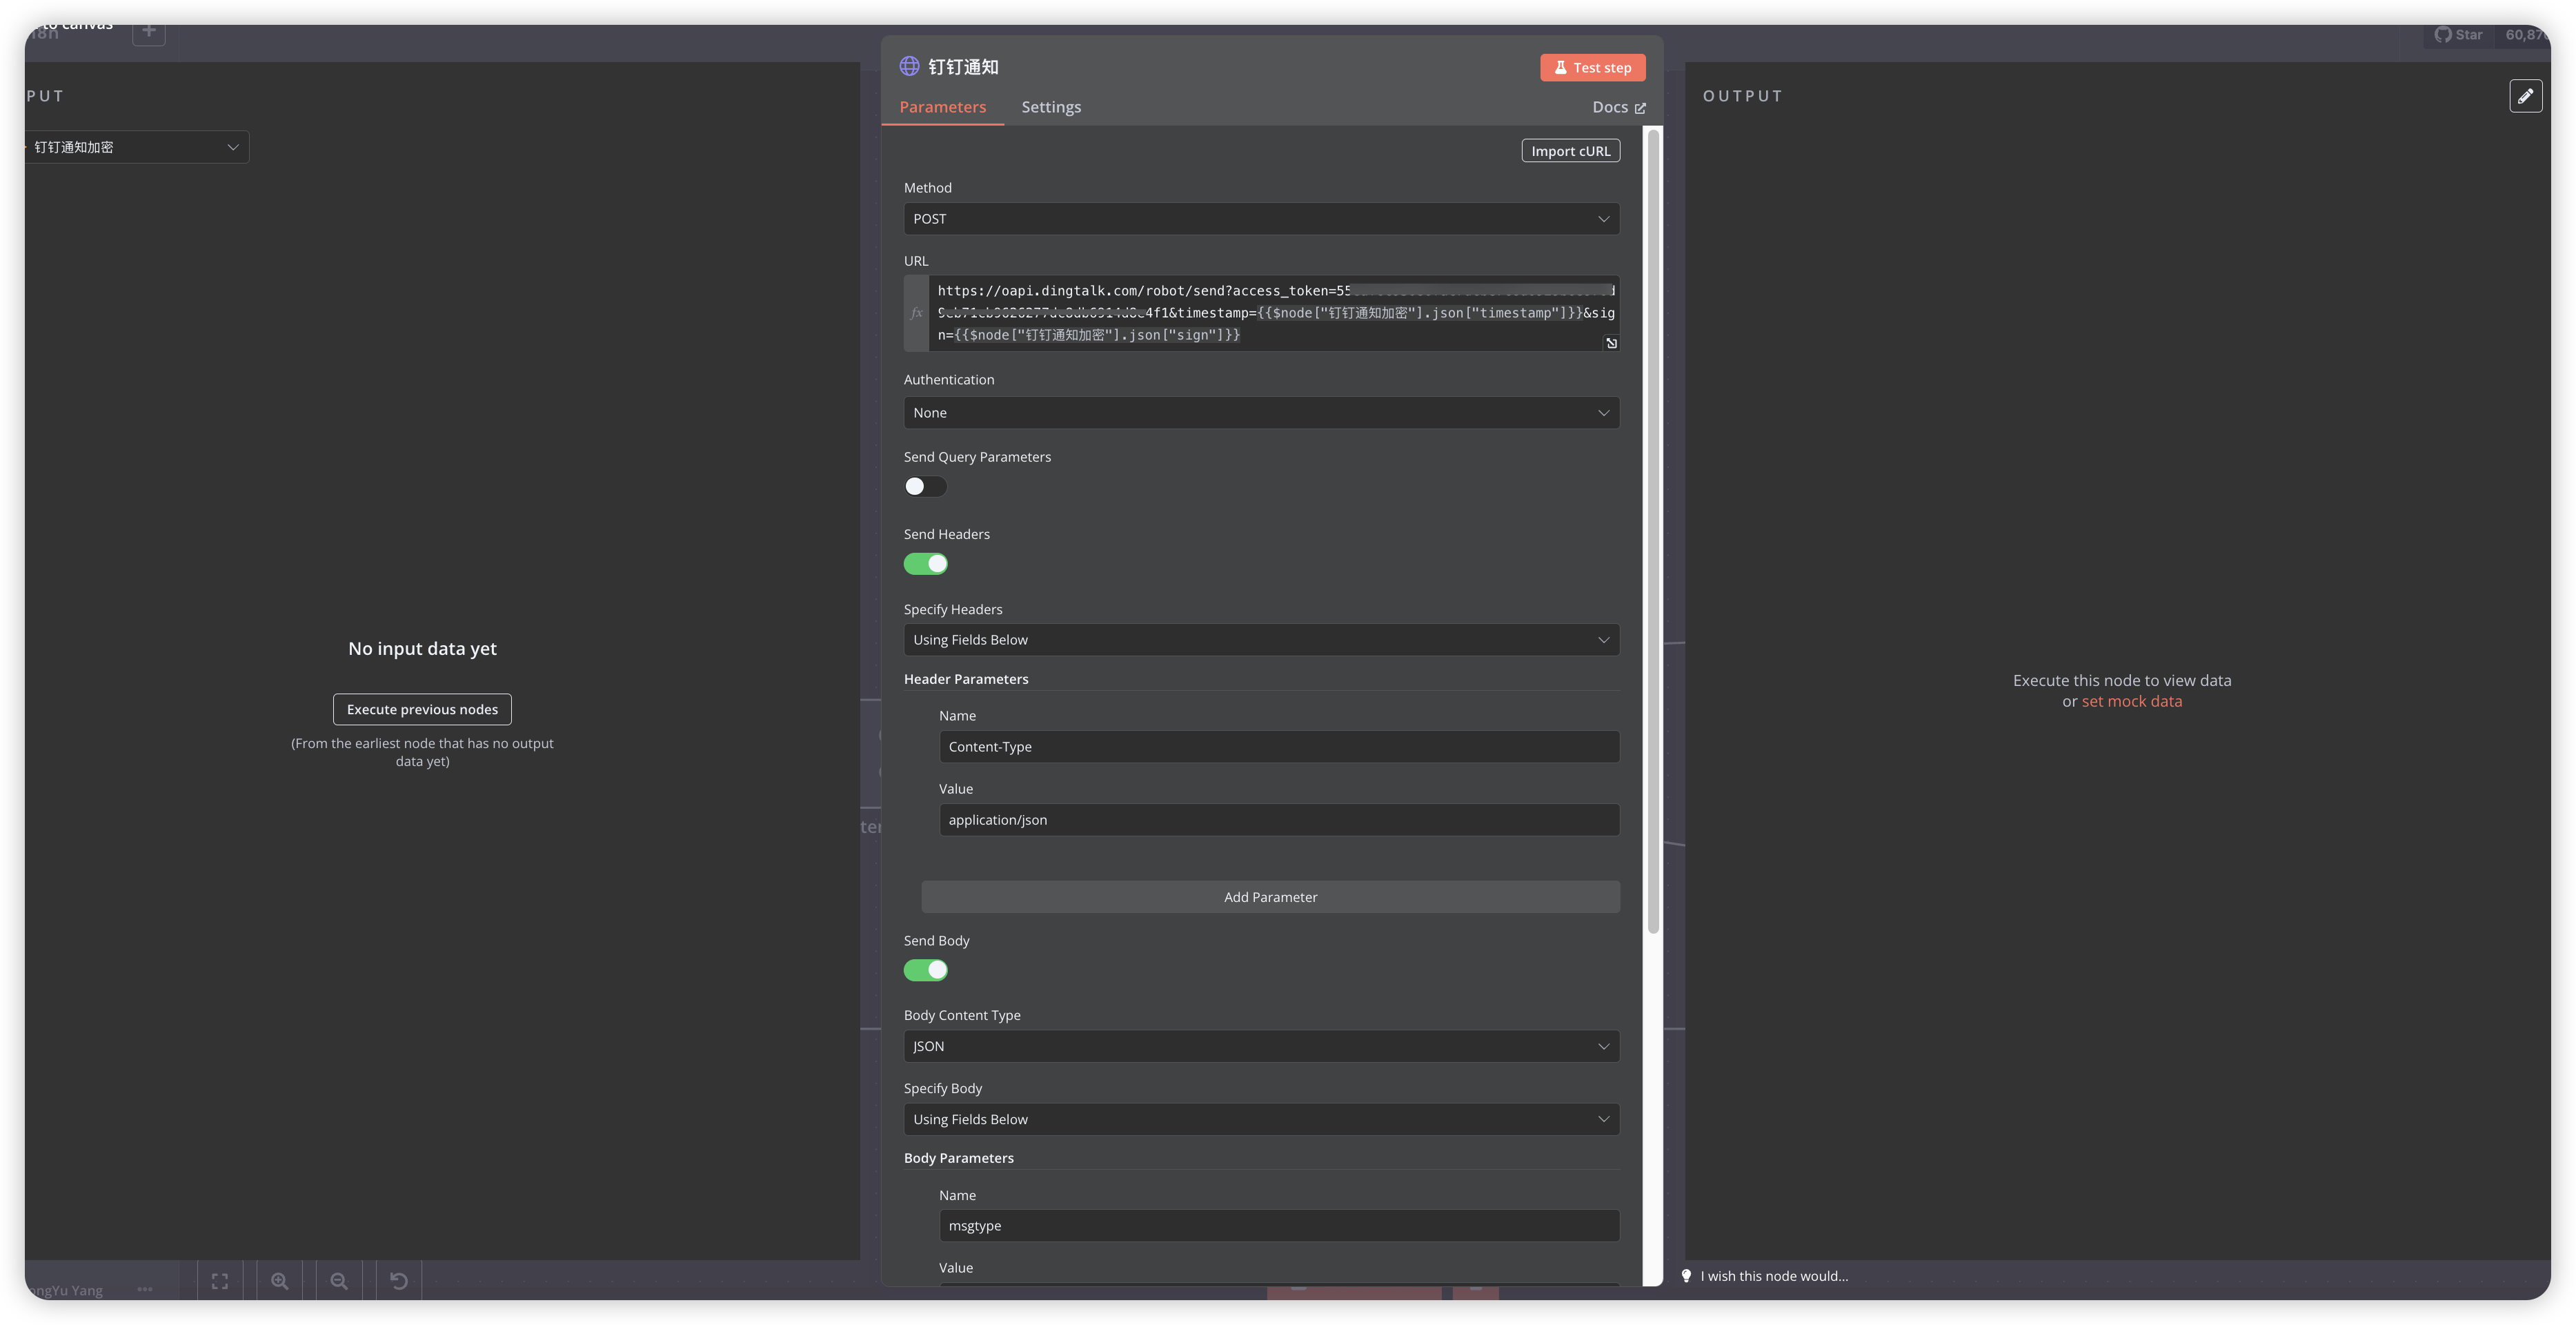
Learn RSS to DingTalk message flow implementation
Deep dive into n8n Python extension development
Get ready-to-use DingTalk push workflow templates
Master automation workflow debugging techniques
Target Audience
Teams needing automated RSS information aggregation
Developers wanting to implement DingTalk group automation
DevOps engineers interested in workflow automation
Tech enthusiasts looking for open-source automation tools
I. Private Deployment of n8n
1.1 Basic Environment Setup
Before installing n8n, we need to create the necessary directory structure. The following commands will create the required folders in the user’s home directory:
# Switch to root user
su
# Enter password
# Create n8n main directory and subdirectories
mkdir -p /root/data/docker_data/n8n/

# Command explanation:
# mkdir: command to create directory
# -p: create parent directories if they don't exist
# /root/data/docker_data/n8n/: create n8n folder in /root/data/docker_data/ directory

# Enter n8n directory
cd /root/data/docker_data/n8n/
1.2 Docker Compose Configuration
In this step, we’ll configure Docker Compose to manage n8n and its dependencies. This approach is easier to manage and maintain compared to running containers directly.
Create docker-compose.yml file:
cd /root/data/docker_data/n8n/
vim docker-compose.yml
To extend n8n’s functionality, we need to add Python environment and related dependencies. This enables n8n to handle more complex data transformation tasks.
FROM docker.n8n.io/n8nio/n8n:latest

USER root

# Install Python environment
RUN apk add --no-cache python3 py3-pip

# Create virtual environment
RUN python3 -m venv /opt/venv

# Activate virtual environment and install dependencies
ENV PATH="/opt/venv/bin:$PATH"
RUN pip install --no-cache-dir html2text beautifulsoup4

# Switch back to node user
USER node
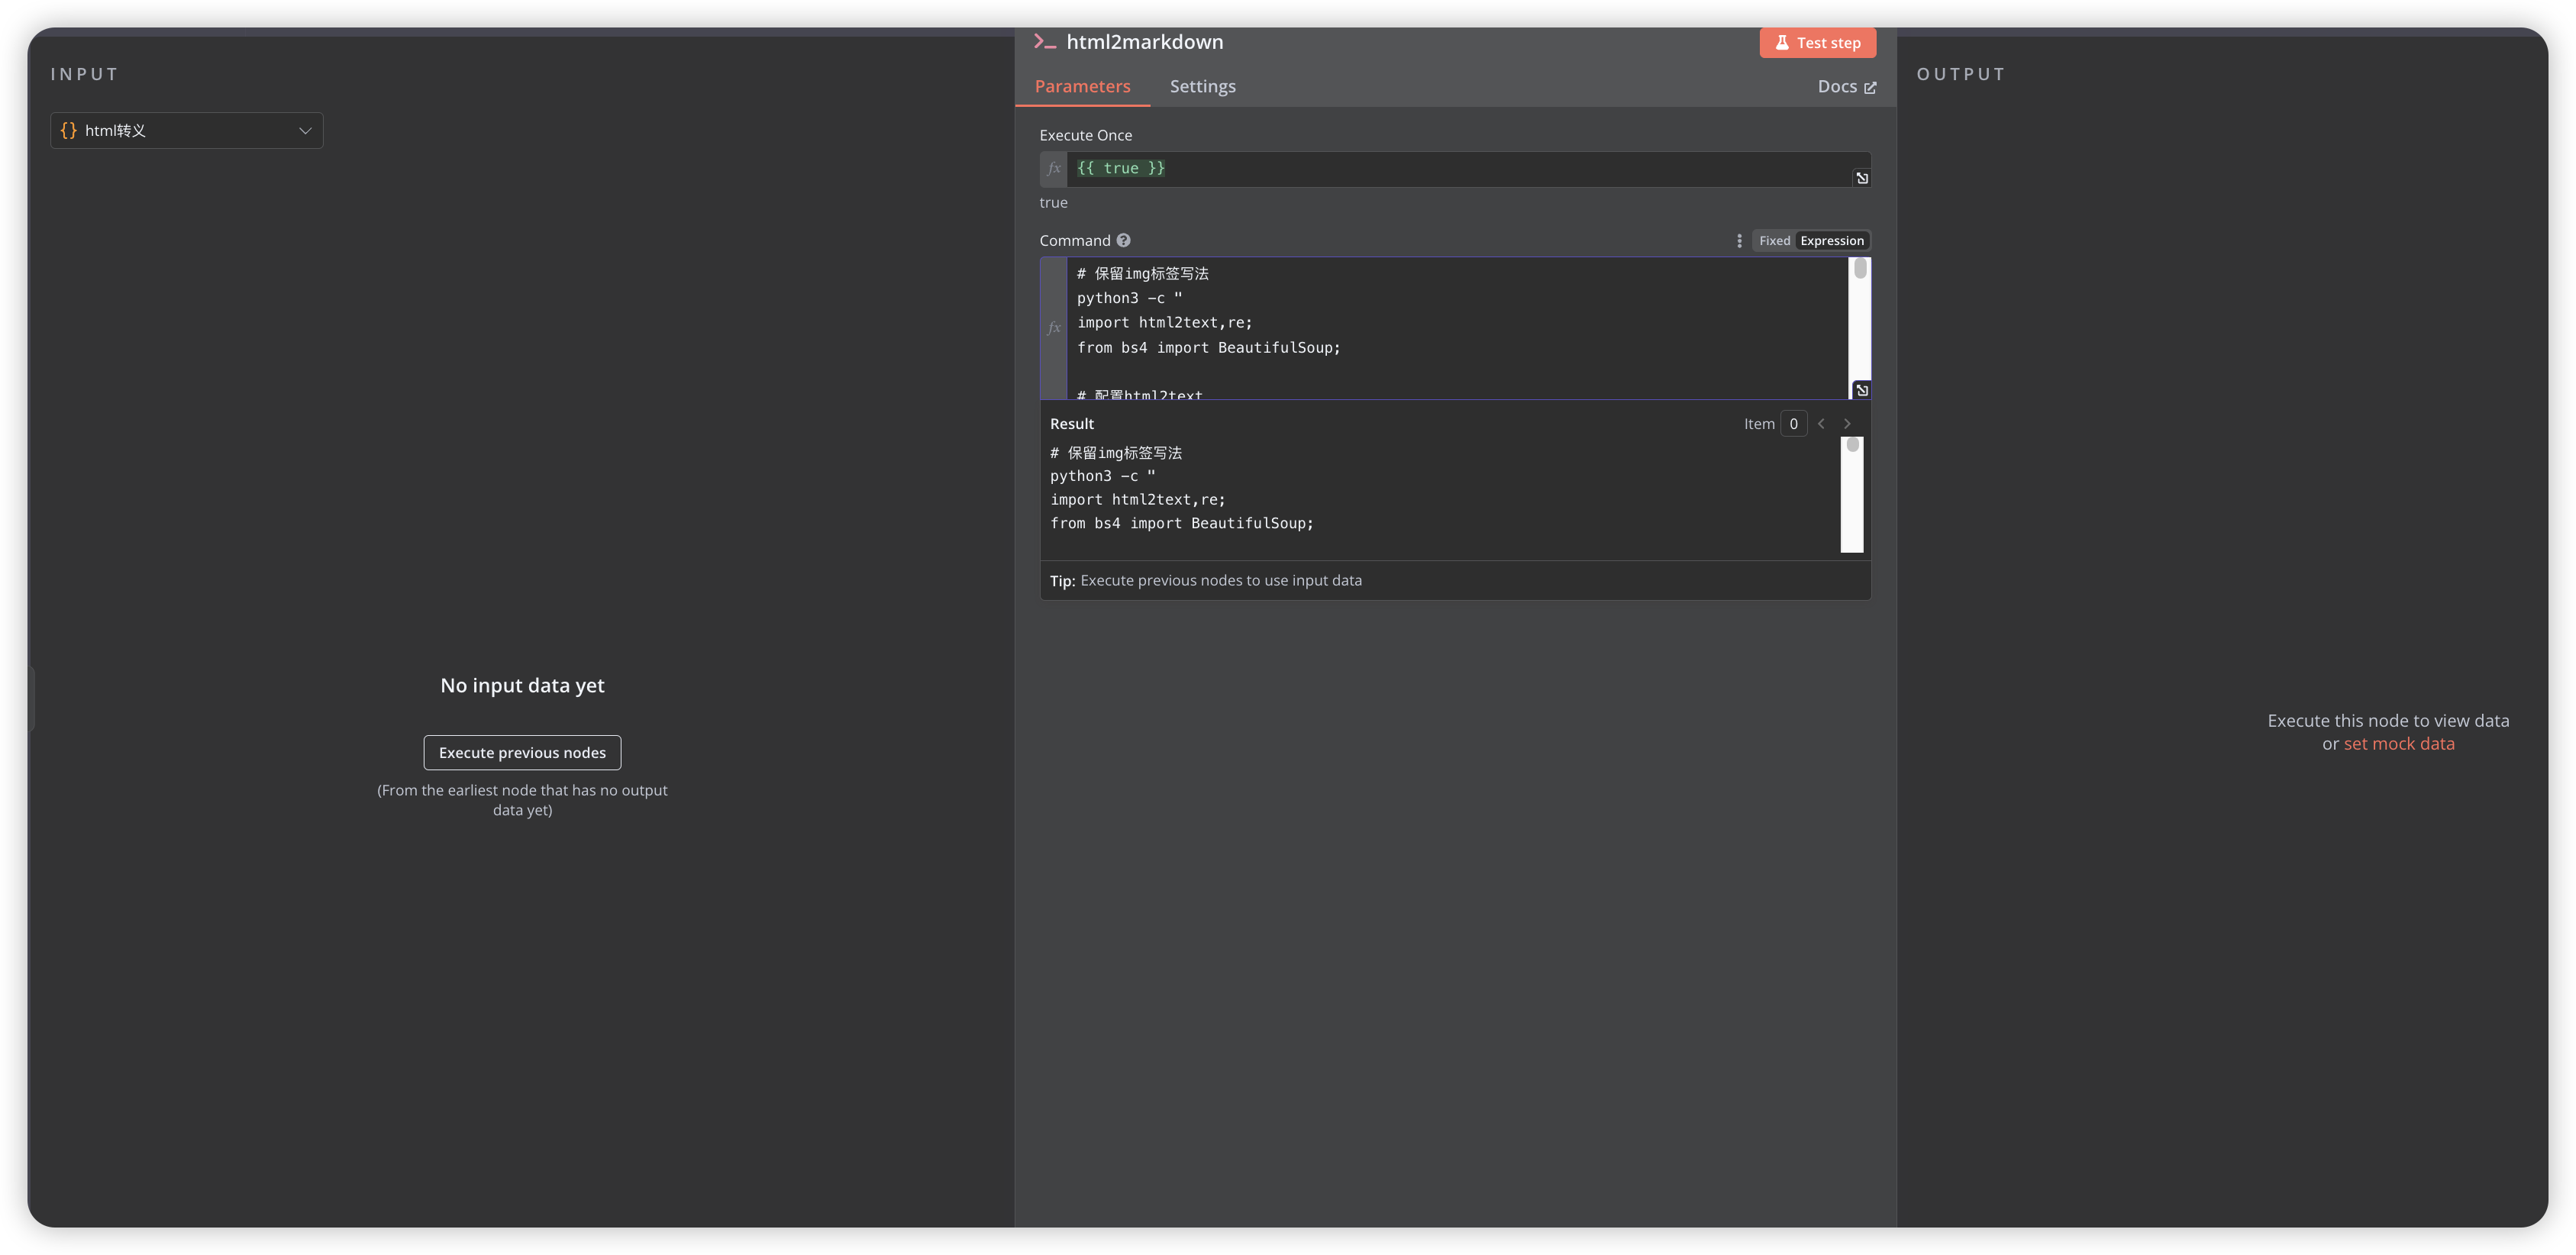
Use Execute Command node to call server-installed Python library for HTML to Markdown processing
Python code for processing HTML content:
python3 -c "
import html2text,re;
from bs4 import BeautifulSoup;

# Configure html2text
h=html2text.HTML2Text();
h.ignore_links=False;
h.body_width=0;
h.escape_snob=True;
h.unicode_snob=True;
h.mark_code=False;

# Preprocess HTML content
content='{{ $json.escaped_content }}'.replace('\\\\\"','\\'').replace('\\\"','\"');

# Use BeautifulSoup to extract and preserve original image tags
soup=BeautifulSoup(content,'html.parser');
img_tags={};
for img in soup.find_all('img'):
    if img.get('style') or img.get('width') or img.get('height'):
        img_str = str(img).replace('\"', '\\'');
        img_tags[img.get('src','')] = img_str;

# Convert to Markdown
md=h.handle(content);

# Process all escape characters
md=md.replace(r'\(',r'(').replace(r'\)',r')').replace(r'\[',r'[').replace(r'\]',r']').replace(r'\.', r'.').replace(r'\-',r'-').replace(r'\n',r'\n').replace(r'\!',r'!').replace('\"', '\\'');

# Replace markdown image syntax back to original HTML tags
for src, html_tag in img_tags.items():
    pattern=f'!\\[([^\\]]*)\\]\\({re.escape(src)}\\)';
    md=re.sub(pattern, html_tag, md);

print(md);"
3.3 Performance Optimization and Batch Processing
To improve workflow stability and efficiency, we need to process large amounts of data in batches.
Add Code node for batch processing of returned data